Optimization - Batching and Culling
Batching
In rendering, meshes are drawn to the screen one at a time. Vertex information of the mesh is passed to the graphics device and sent through the rendering pipeline. This is known as a draw call. Draw calls are often resource-intensive, with the graphics API doing significant work for every draw call, resulting in performance overhead on the CPU. This is mostly due to the state changes done between the draw calls (such as switching to a different Material), which requires resource-intensive validation and translation steps in the graphics driver.
Consider a scene with n objects. To render this scene, there would be at least n draw calls. This would be unavoidable if these objects have to move independently, as each object would have to be rendered with a different transformation matrix, or with different materials. However, this is often not the case. If the scene contains many objects that share the same material, they can be optimized with a technique known as Batching.
With batching, we can reduce the total number of draw calls and improve the performance of our application.
Batching Requirements
In Unity, only objects that share the same material can be batched together. This means that you want as many objects to share the same materials as possible. If you have multiple materials where the only difference is that they do not share the same textures, you can combine those textures into a bigger texture. This technique is known as texture atlasing.
Furthermore, here are some additional requirements. A complete list can be found here.
- Each mesh must contain fewer than 300 vertices.
- Game objects cannot have mirrored scale. (one with +1 and another with -1 scale)
- They must be rendered with the same instance of a material.
Dynamic Batching (Default Engine Optimization)
Gameobjects with the Mesh Renderer component in Unity is by default Dynamically Batched. Dynamic batching computes world space vertex positions on the CPU, so it is only an advantage if that work is smaller than doing a draw call. If your meshes fulfil the requirements above, no action is required to have them dynamically batched.
Another advantage of dynamic batching, aside from the fact that it requires little to no work to implement, is that objects can still be individually culled.
Dynamic batching is is only effective if the draw call has a higher overhead than doing vertex transformations on the CPU. The resource requirements of a draw call depends on many factors, and on modern graphic APIs, the overhead is often so low that dynamic batching is not an advantage at all.
Static Batching
Static batching works by combining multiple objects into one, and thus reducing the number of draw calls. Internally, Unity builds a shared vertex and index buffer for the multiple objects. This is often more efficient than dynamic batching as it does not generate additional CPU overhead, but uses more memory when storing the combined geometry.
Static batching is not without its faults. The first is that objects that are statically batched cannot move. If you require your objects to move, those objects cannot be statically batched. Another downside of static batching is that it has a larger memory footprint. This is because static batching requires additional memory for storing the combined geometry.
Due to the high amounts of memory used, Unity does not statically batch trees on a terrain. Combining trees in a dense forest level can have serious memory impact.
Manual Batching
You can also manually batch objects together by combining meshes in a 3D package such as Blender. In such cases, be careful to only batch small groups of meshes together at a time. This is because if even a small portion of a batched object needs to be drawn, computation for drawing the entire mesh would occur.
Comparing Performance
Given the advantages and disadvantages of the two batching techniques, it is clear that different situations would call for different type of batching to be utilised in order to achieve the best performance. Let's explore further by looking at the tangible performance differences ourselves.
1. Open or create a new Unity project.
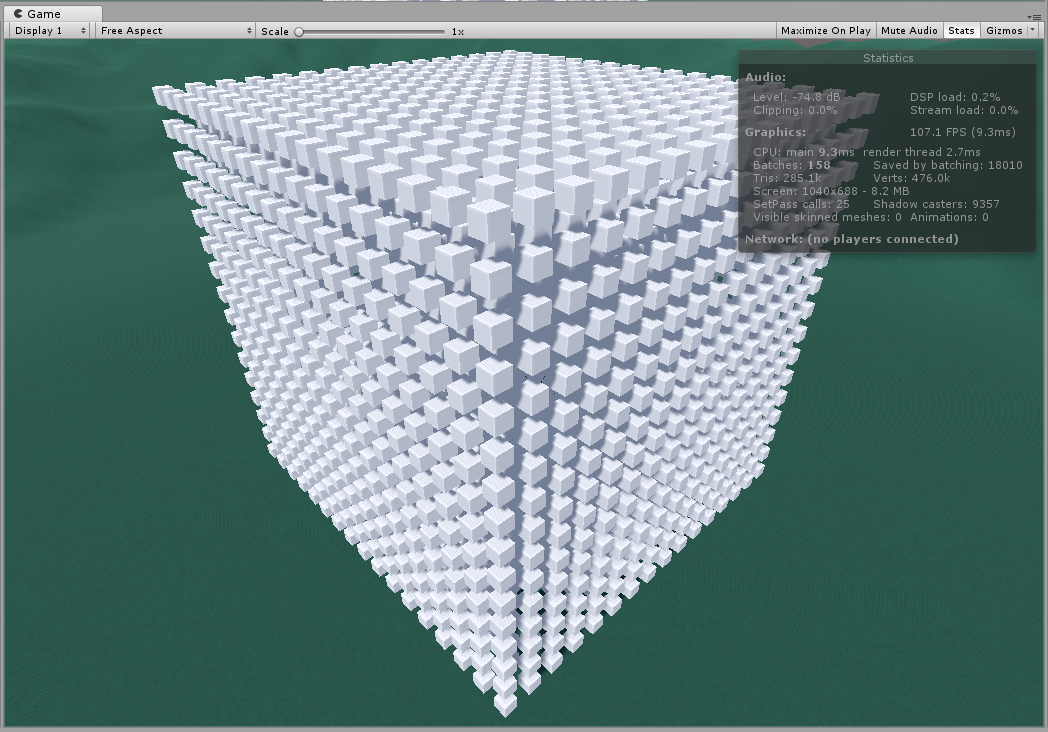
2. Create a new scene and, using your most creative method, generate a large number of gameobjects. Position your camera such that they are visible. Here are 4000 cubes:
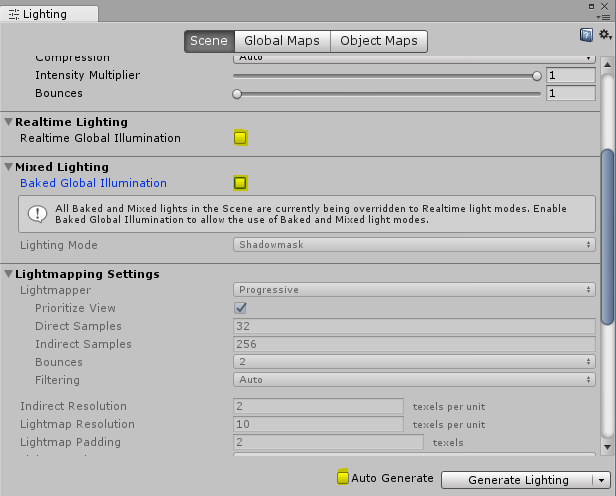
3. Since we only want to observe the effects of batching, disable baked lighting so that it will not affect our results. In the Lighting window (Window > Lighting > Settings), uncheck Realtime Global Illumination, Baked Global Illumination, and Auto Generate.
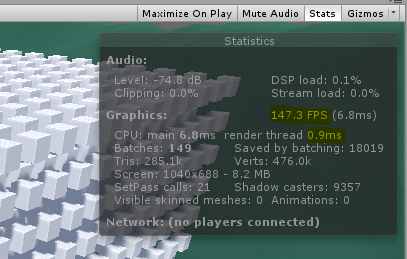
4. Open up the Stats window, and note the FPS, frame time (time in milliseconds to render each frame), and the number of batches. This indicates the rendering performance for dynamic batching in our current scene. Since our cubes all share the default material and are under 300 vertices, they are by default dynamically batched.
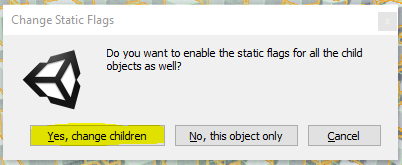
5. Select all objects in the scene hierarchy and check “static” in the inspector window. This enables static batching on these objects.
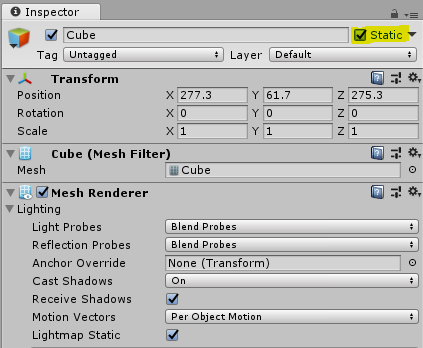
6. If prompted, change the static flag for the child objects as well.
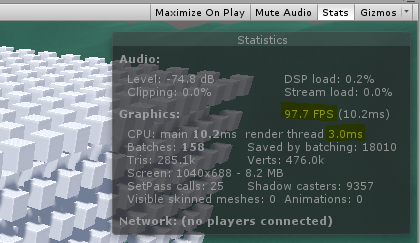
7. Enter play mode and note any improvements to your FPS, as well as reduced render time. In the cubes scene, our FPS increased from around 90 to 150, and the render thread only took about 1ms as compared to 3ms.
Culling
Culling is an optimization technique to reduce frame time and draw calls by simply not rendering objects that are hidden from view. When an object is culled, is it not drawn. There are two different types of culling.
Frustum Culling
Frustum culling is an automatic optimization process in Unity where objects outside of the camera's frustum – the bounding volume defined by the camera’s field of view, near plane and far plane – is simply ignored and not drawn. It is because of frustum culling that manual batching is recommended to be only done on small groups of objects.
Occlusion Culling
Occlusion culling culls objects that are hidden behind other objects, even if they are technically within the camera’s view frustum.
In the previous scene with 4000 cubes, the majority of cubes are hidden behind other cubes (occluded). The hidden cubes are not visible, but are still rendered anyway. This is known as overdraw. We can significantly optimize this setup by not drawing objects that are occluded.
Unity's Scene view window comes with a handy tool that allows us to visualize overdraw.
We can reduce overdraw through occlusion culling.
Setting Up Occlusion Culling
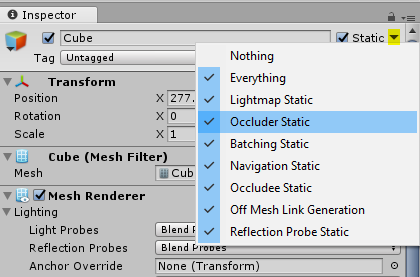
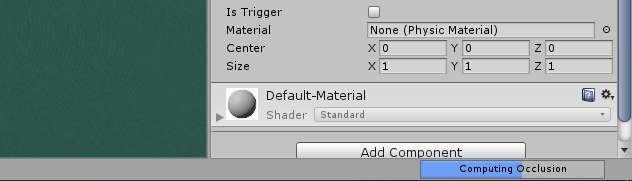
1. Flag all objects as static. Specifically, our objects has to be Occluder Static and Occludee Static.
2. Open the Occlusion window Window > Occlusion Culling.
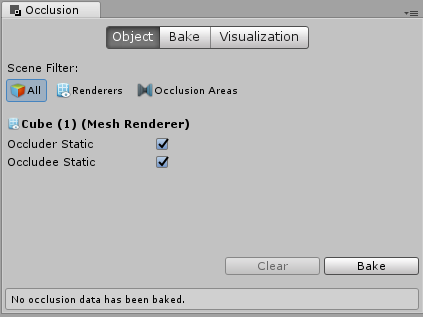
3. Save your scene, and click on Bake.
4. Allow Unity to compute occlusion data. The progress bar can be found on the bottom right of the screen. This process may take several minutes.
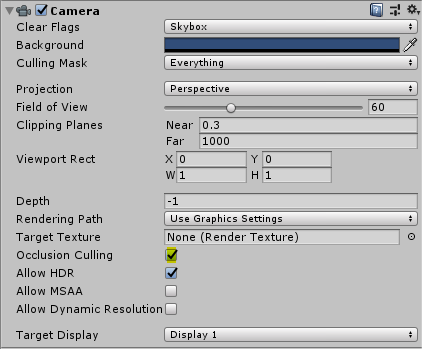
5. Ensure that Occlusion Culling is enabled on the Camera component.
6. Select your camera. Under the Occlusion Culling dialog that should appear in the scene view in the scene view, select visualize. Move the camera around and you should be able to see which objects are occluded and not drawn.
If your occluders are relatively small (like in the example above), you may have to reduce Smallest Occluder setting in the Bake tab of the Occlusion Settings window. This will significantly increase baking time. In the example above a much larger cube is used to illustrate occlusion culling.