Lesson 1 - Intro to Unity3D Engine
Create A New Project
1. Create a new folder on Desktop for all your cs4240 projects and give it a name, say “cs4240Projects”.
2. Run Unity HUB and login your own account. [Activate a personal license using your Unity account if asked]
3. You will have an option to either open an existing project, add or create a new project. For this lab, we are going to create a new project. Click on the “New Project” button as shown below.
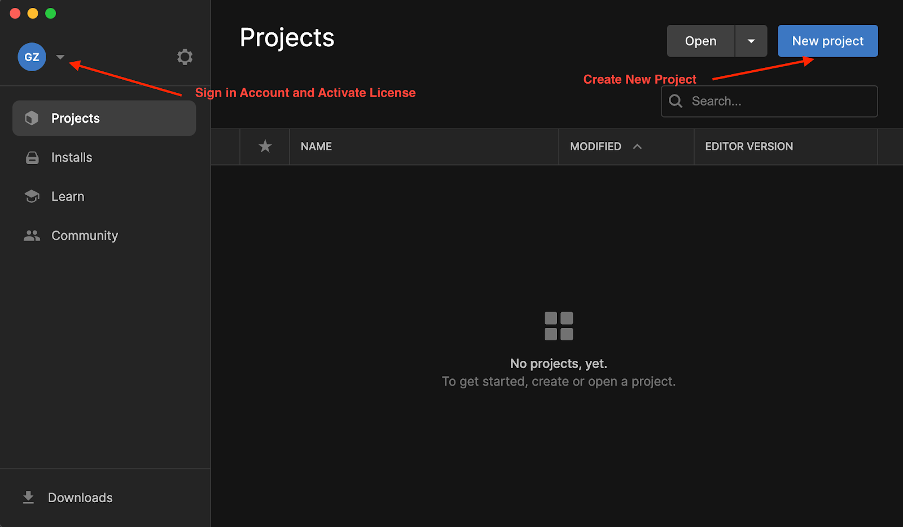
Hover over an image to zoom in
4. Select 3D template. Set a new project location to folder you just created on the Desktop. Set a new project name (say, 'Lab01'). Unity will create a new folder in this project name. This will be your project folder where to store all game assets, scripts, sound, etc. Click the Create button.
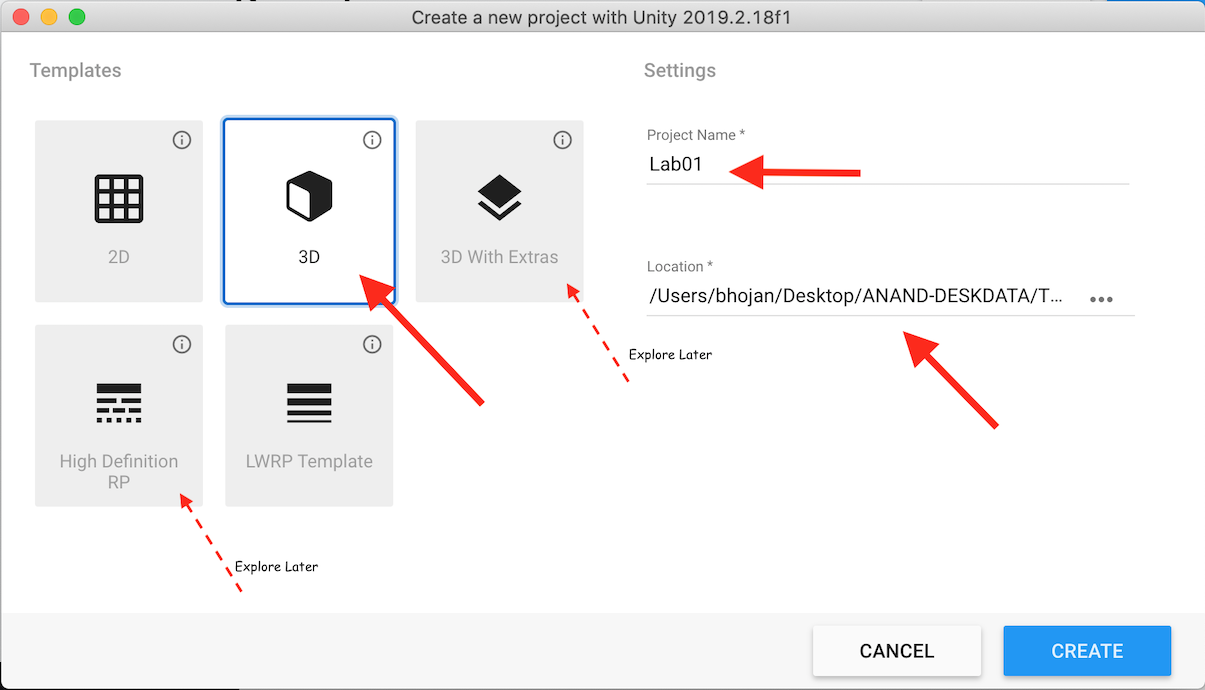
Hover over an image to zoom in
Familiarize With the Engine
5. Unity will now load up with the default view as shown below.
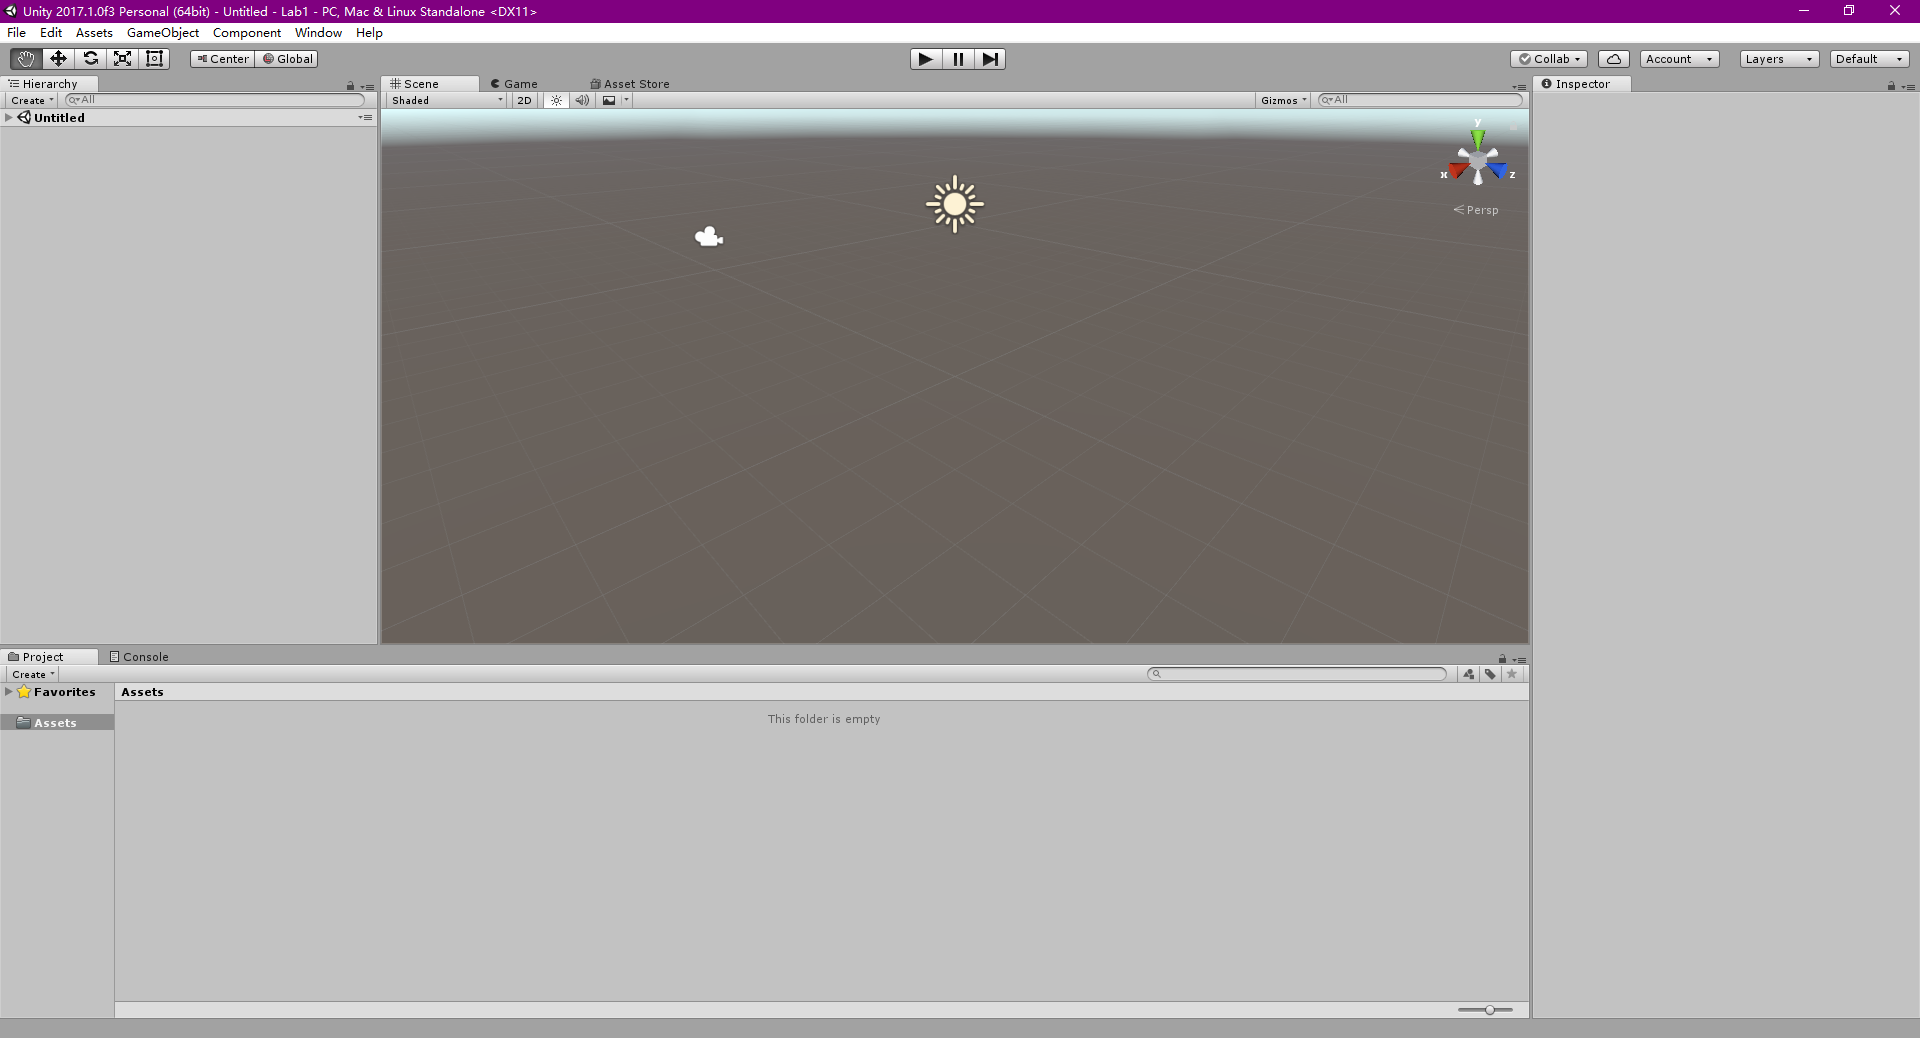
Hover over an image to zoom in
6. This view can be customized by either selecting one of the built-in layouts or simply dragging the windows around until you get a view you are comfortable with. You can choose one of the built-in layouts or create your own layouts. The built-in layouts can be found by clicking Window > Layouts.
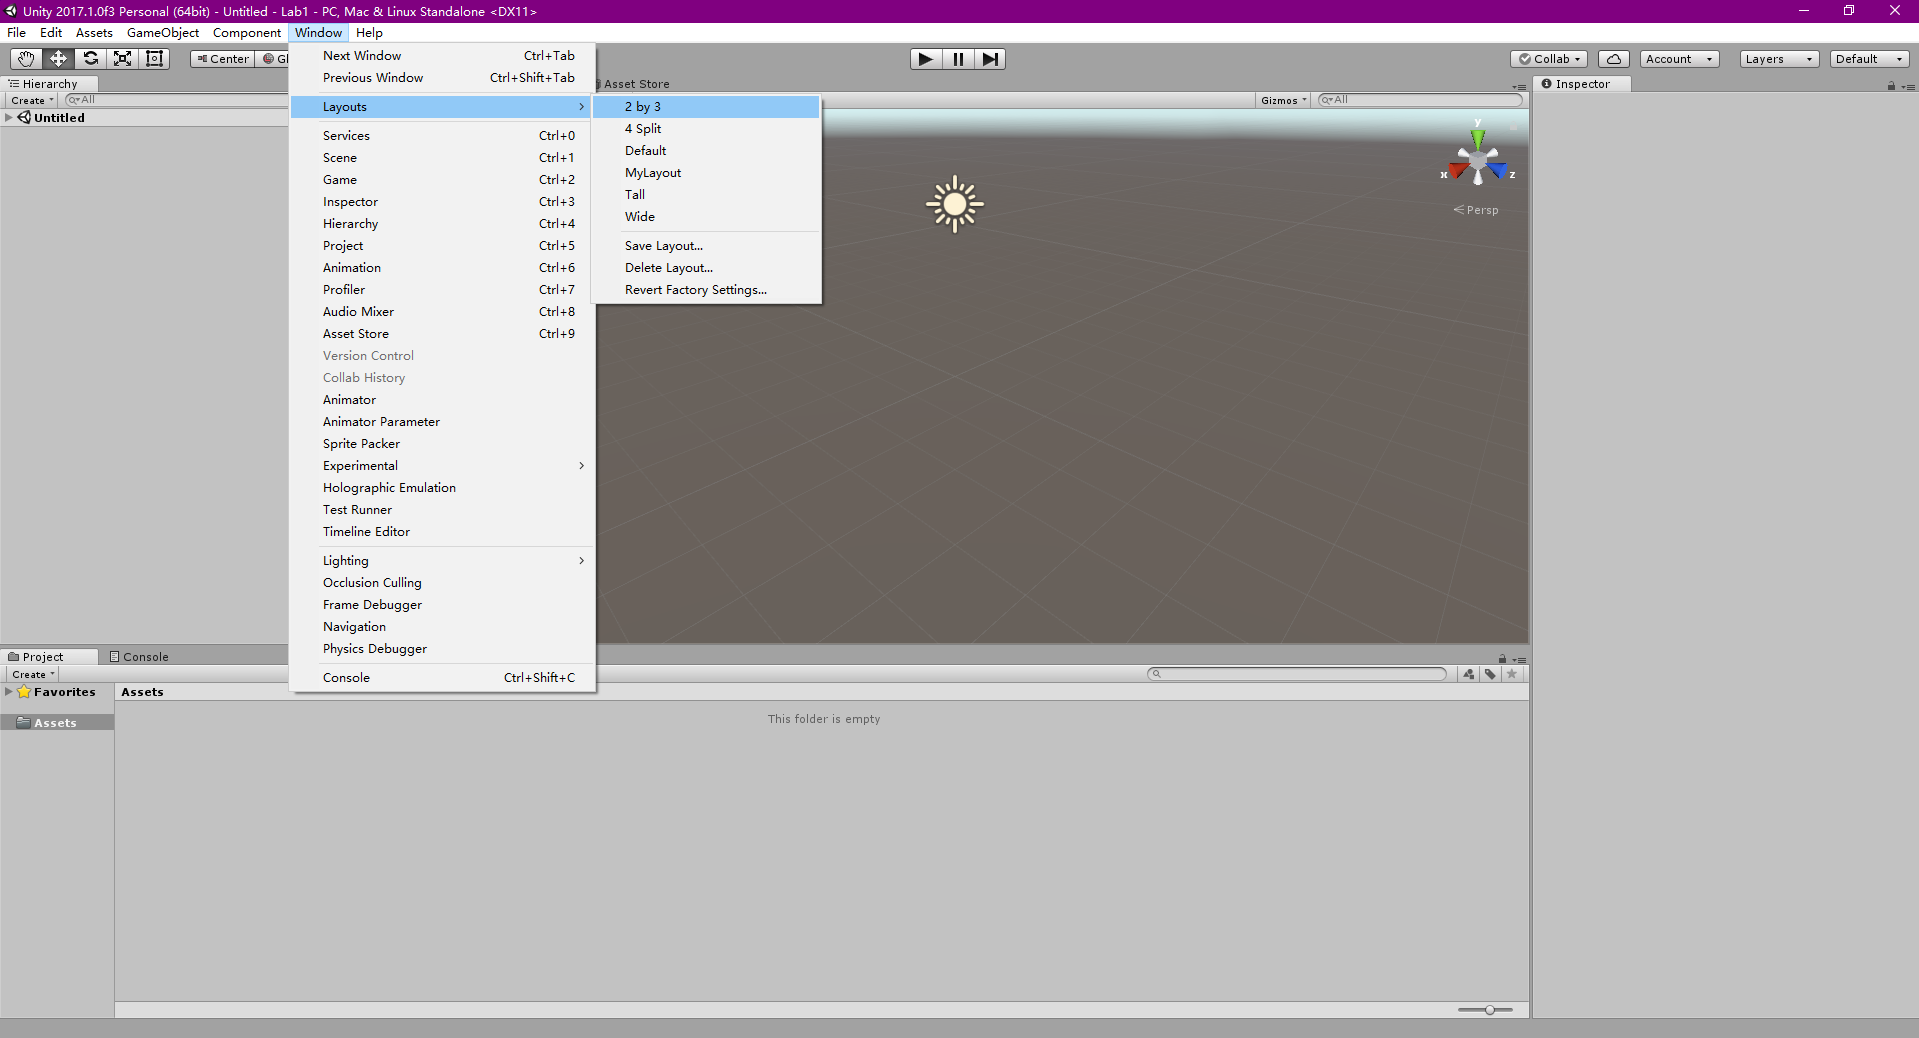
Hover over an image to zoom in
7. As you can see, there are different tabs/panels in Unity. The following are the introductions for these panels.
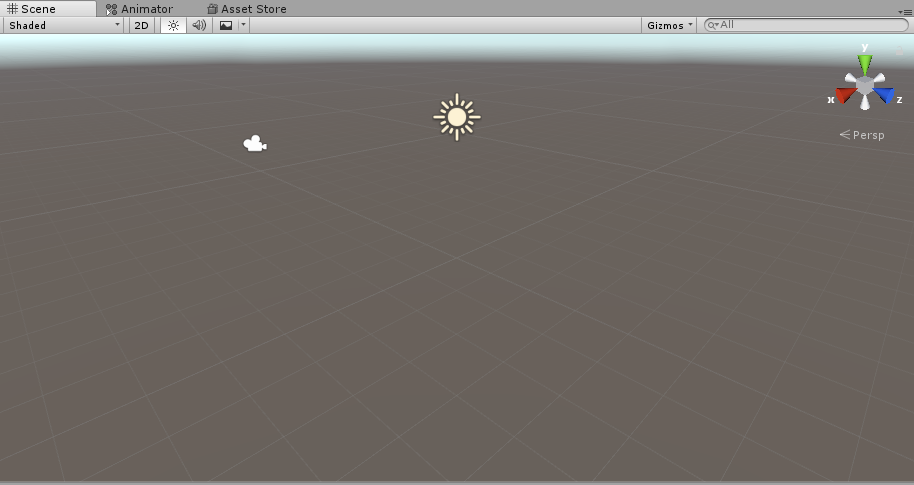
- Scene: This is the main panel you will use in Unity. It is where you build your “game world”. All the assets in your game such as the player and sceneries will have to be added into this panel. You will learn how to do that as you progress with this lab.
- Game: This panel will show how your game will look like when it is being played. What you see in this panel will be the view from your main camera. You will use this panel to test and play your game.
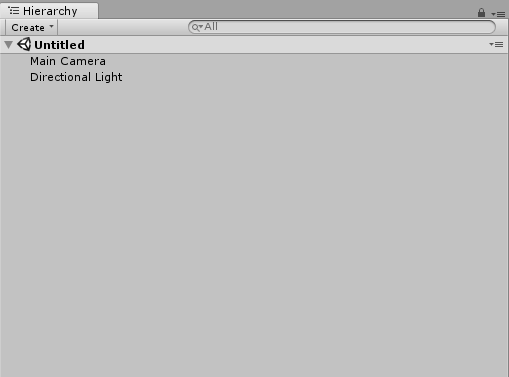
- Hierarchy: This panel will list down all the items/assets (also known as game objects) that you presently have in the game world. In other words, whatever you add into the Scene will be listed in this panel. This allows you to easily access any of the game objects in the scene. Thus, it is recommended that you name your game objects meaningfully.
- Project: This panel will list down all the assets and scripts that you have in your project folder. Do not confuse this with Hierarchy. In the Project panel, all assets will be displayed, whether they exist in the game world/scene or not. Hierarchy only displays those assets presenting in the scene.
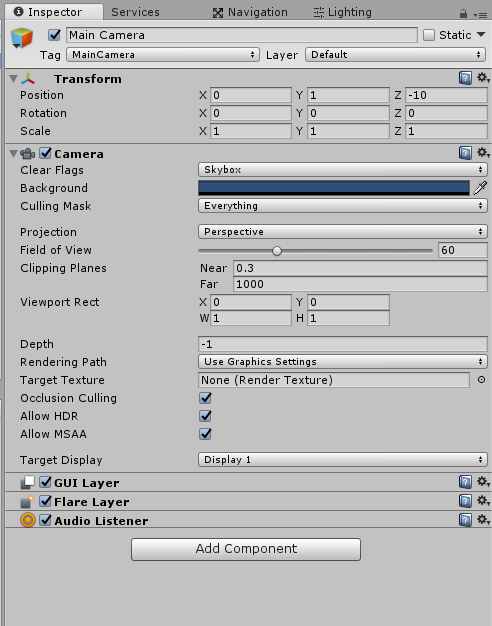
- Inspector: This panel will display the properties of any item within the project. You can use this panel to modify the game object (e.g. change its size, attach scripts, etc.). You will learn how to do so as we progress.


Do note that it is better to play around and familiarize with the interface as it will not go through everything in detail due to the lack of time.
Build Your First Object
8. Let us learn the controls within Unity now.
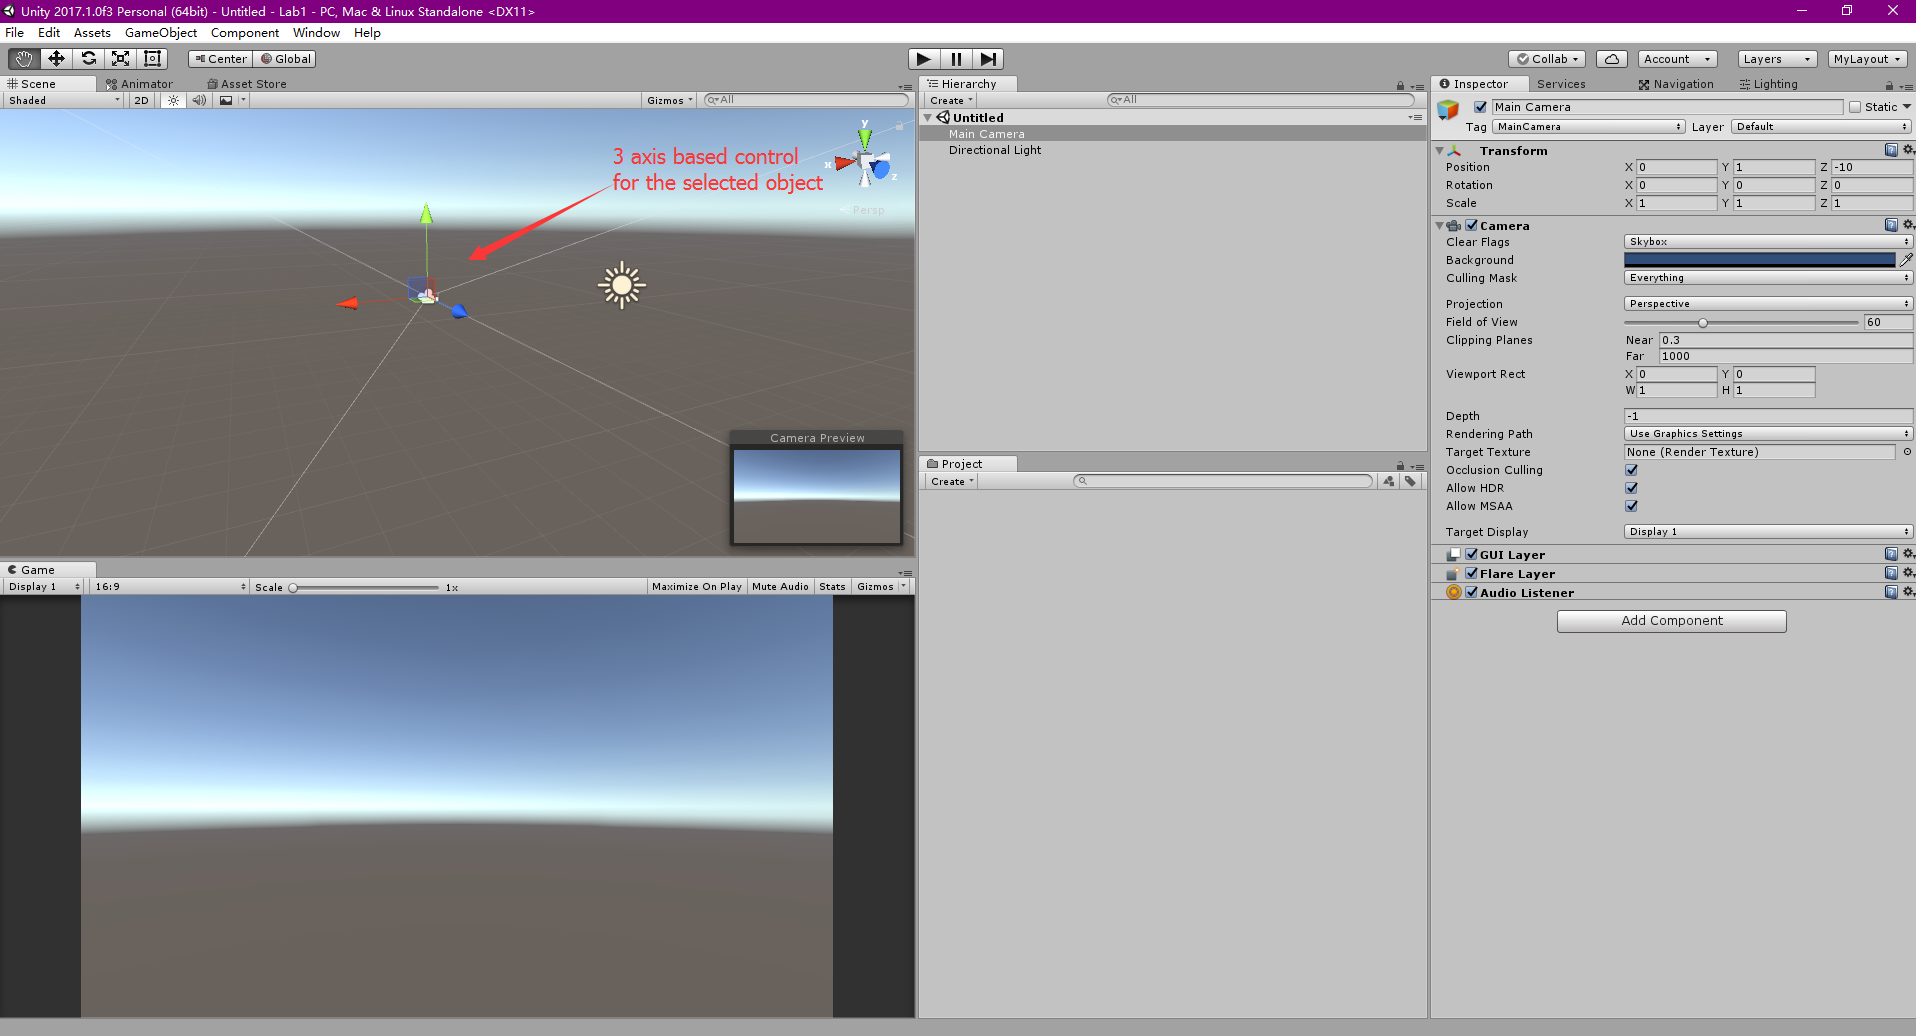
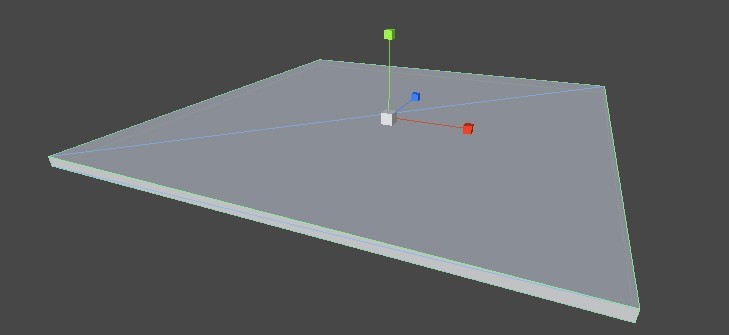
Select the Main Camera. To do so, click on the Main Camera in the Hierarchy window. You will notice in the Inspector panel that the properties of the camera will show up. If you look in the Scene panel, you will see the camera selected showing 3 arrows representing the three axes (x, y, z). The y axis is green, and it moves the selected object up and down (vertical). The z axis is blue, and it moves the object forward or backward (depth). The x axis is red, and it moves the object left or right (horizontal). To move the object, press and hold on anyone of the axis and drag your mouse.
You will also notice that the Position property in the Inspector panel will change accordingly. The Camera Preview box only appears when you select the camera. It shows you what the camera is looking at and how the scene is will look like in the game. If you want a bigger view, click on the Game panel.
Hover over an image to zoom in
9. Now let’s go ahead and create a ground/floor in the scene. Navigate to the toolbar and click GameObject > 3D Object > Cube.
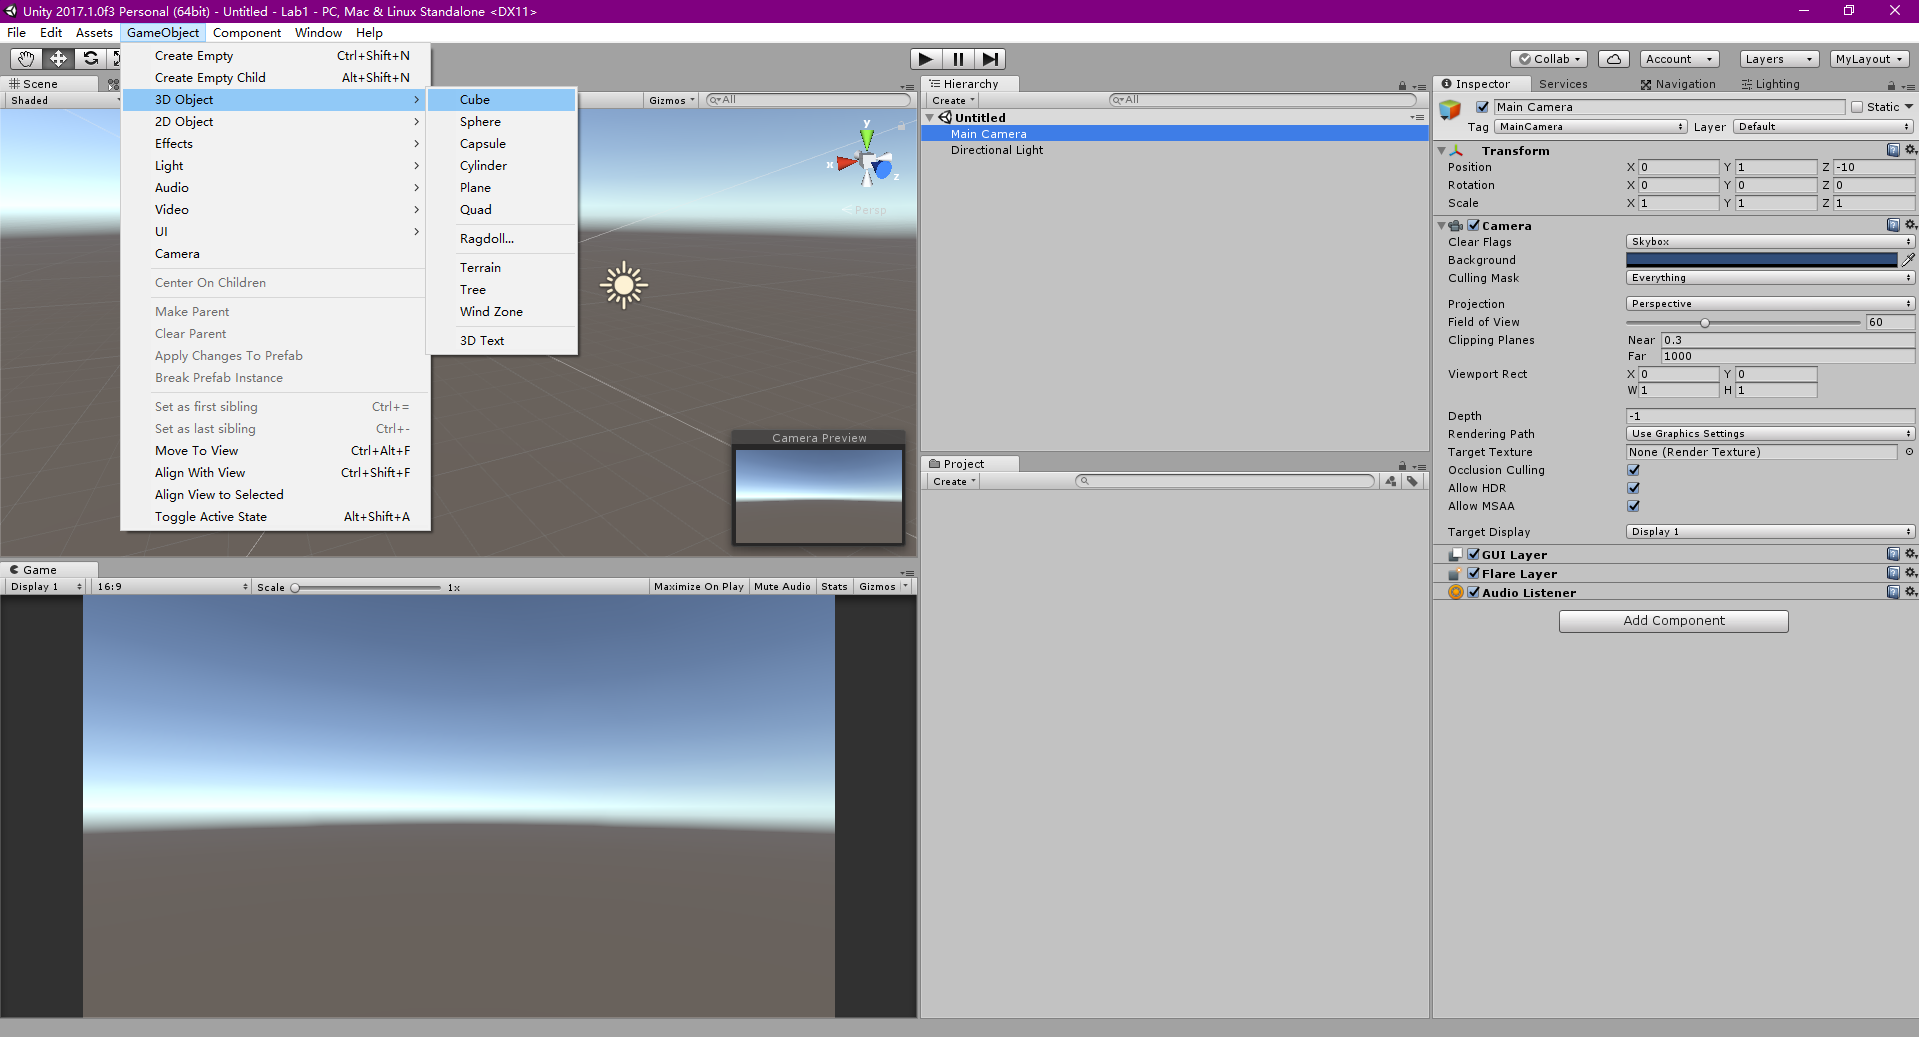
Hover over an image to zoom in
You should see a cube in appearing in the scene. You will also notice that the cube will appear in the Hierarchy.
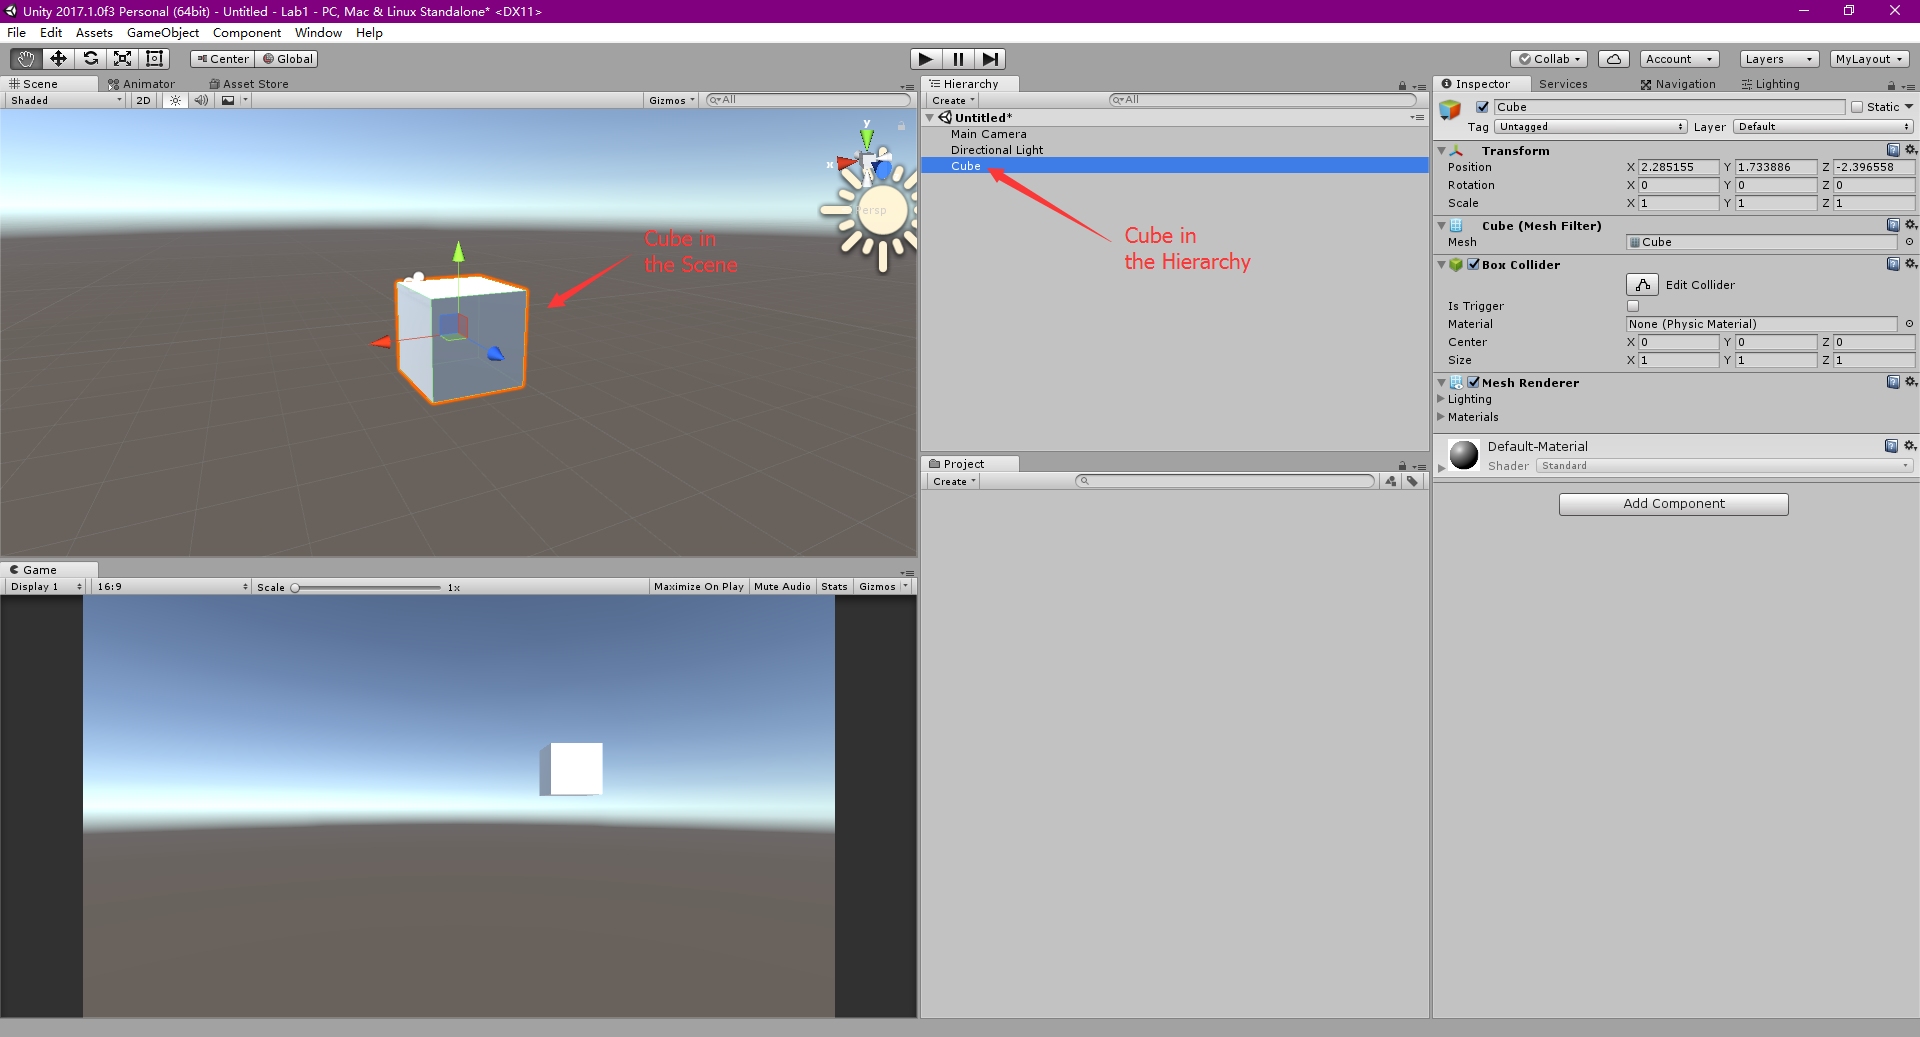
Hover over an image to zoom in
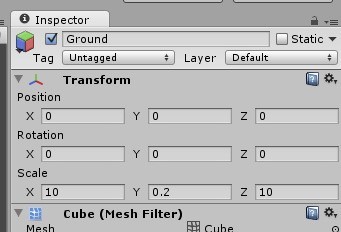
10. Let’s rename the cube to Ground. To do so, right-click on the Cube in the Hierarchy and select rename. As you can see, the cube is small. Let’s zoom in further into the cube. To zoom in and out, hover your mouse over the Scene window and roll the middle mouse button. Another way to focus on the cube, or any object, is to double click it in the Hierarchy.
11. Now let’s resize the cube. There are 2 ways of doing so:
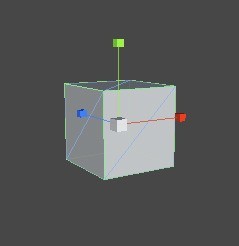
- Select the cube. Hover your mouse over the Scene window. Press R to toggle the scaling control of the cube. You will see the 3 arrows turn into 3 squares. To resize the cube, just drag the appropriate control. To uniformly scale the cube, click on the grey control and drag. You can also move the cube by pressing w to toggle the move tool and rotate the cube by pressing E.
- Select the cube. Go to the Inspector panel. To resize the cube, we are going to modify the Scale attributes. For this lab, let’s set X:10, Y:0.2, Z:10.
12. Now that we have resized the cube (ground), let’s look at how it looks like in the scene. A useful tool that we have is our viewing/designer camera. This camera is not part of the game. Instead, we use this camera to help us build, navigate and view the scene at different angles. We can control our viewing angle by - holding down alt + press and hold the left mouse button and drag. We can move the scene up, down, left or right by - holding down alt + press and hold the middle mouse button and drag. This will allow us to see the whole scene at different viewing angles, which will be helpful when you are building the scene. Try this out and try to get a similar view as shown below.
13. IMPORTANT: ALWAYS CONSTANTLY SAVE YOUR FILE. To save, click File > Save As and save your scene as Game.
Now we know how to create a simple ground. This can be useful in your game if you want to build an indoor area where a flat ground is enough. However, if you need your ground to have hills, bumps and mountains, you will have to create a terrain. One way is to externally model your terrain in Maya. Another way, which is what we are going to do, is to use Unity’s built-in terrain builder.
Set Up Your Scene
14. Now let’s add some Terrain, but first, let’s delete the ground object. Select ground from the hierarchy and press delete. Now navigate to the toolbar and click GameObject > 3D Object > Terrain. You should see something similar to the image below. You may need to zoom out and adjust your view in order to see the whole terrain.
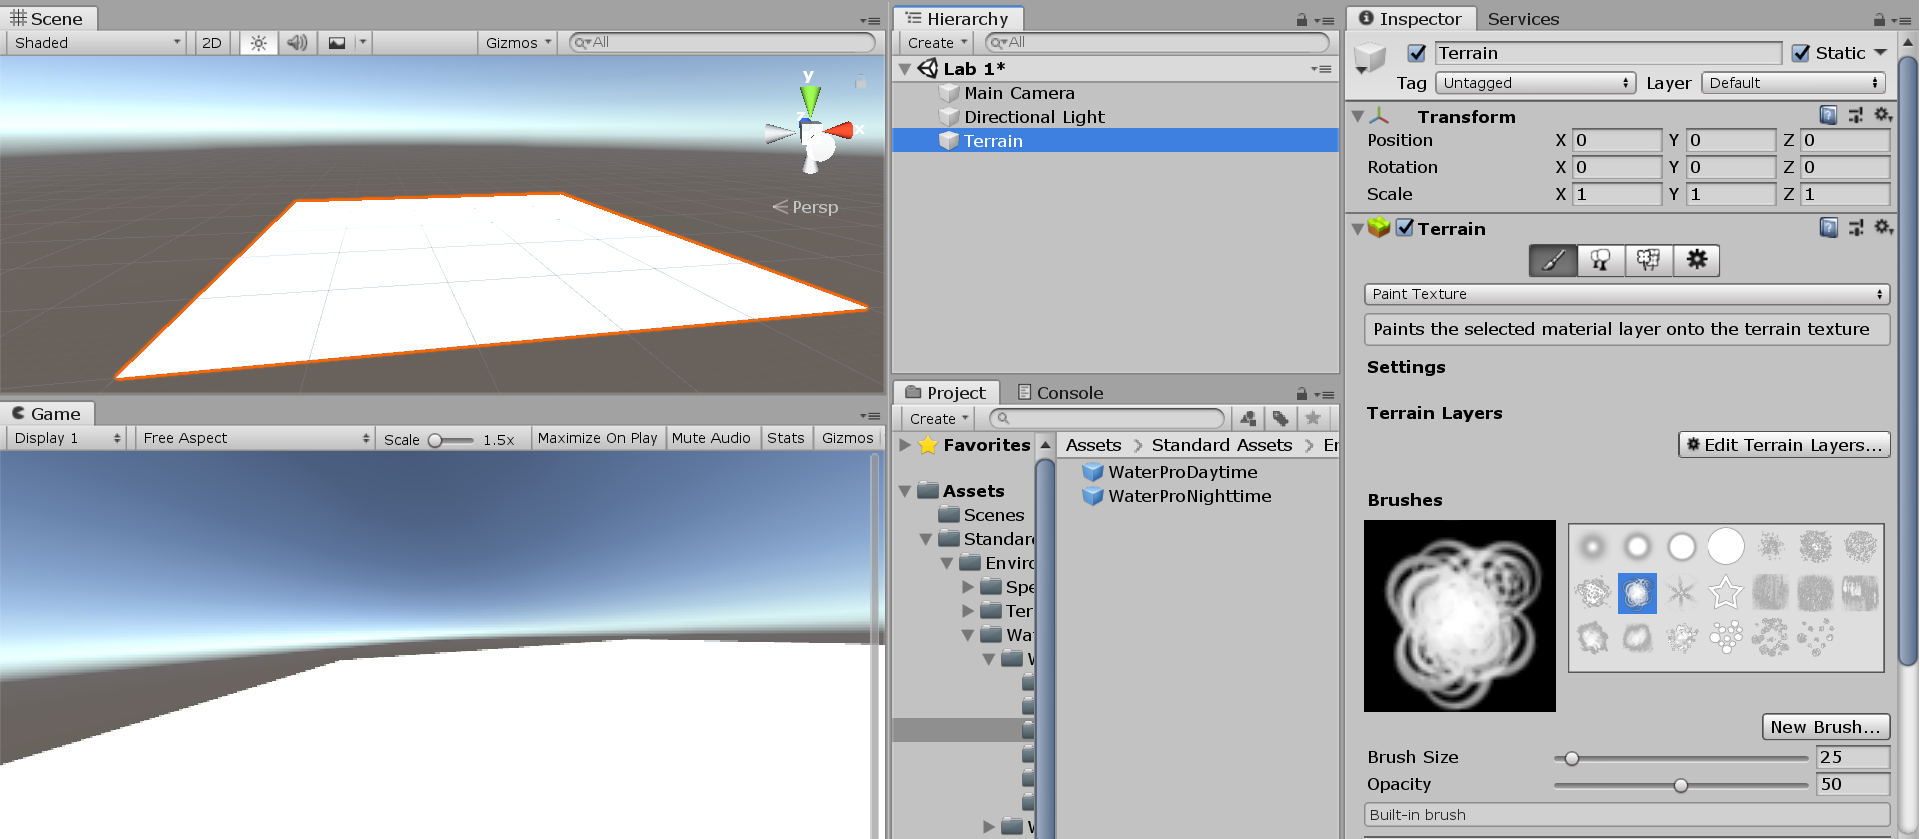
Hover over an image to zoom in
15. As you can see, there are different options available in the Inspector panel. The idea of the terrain builder is to paint your terrain. There are different brushes you can select to build your terrain. This will give you different effects. You can also resize these brushes. I feel that the best way to learn and get familiarized with this is to just play around with these different options. If you need help, feel free to ask me during lab.
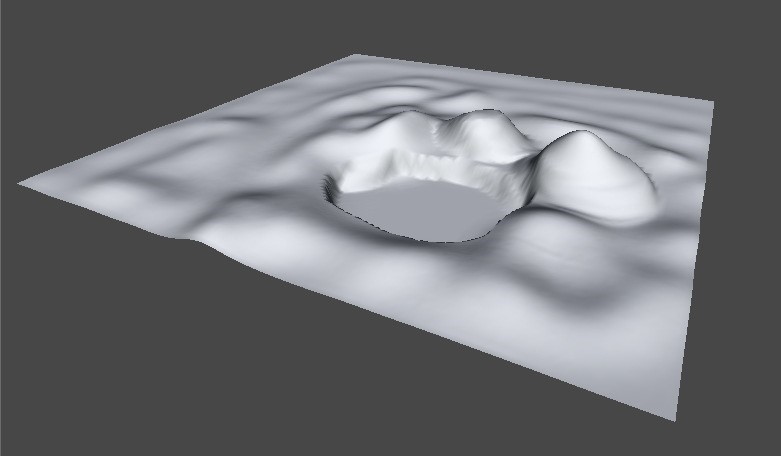
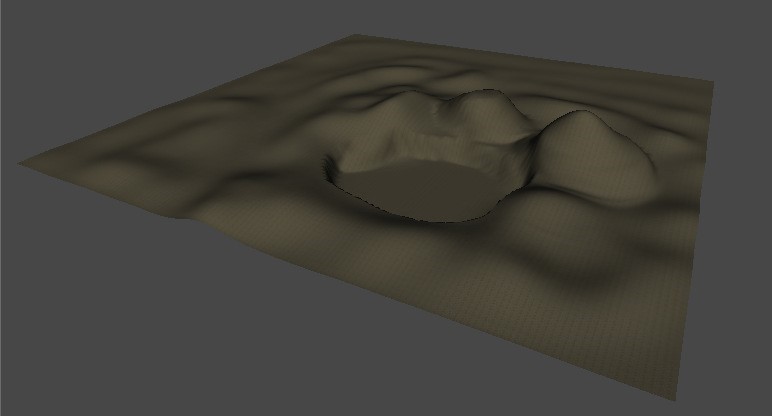
16. Now you should have a simple terrain like the one below.
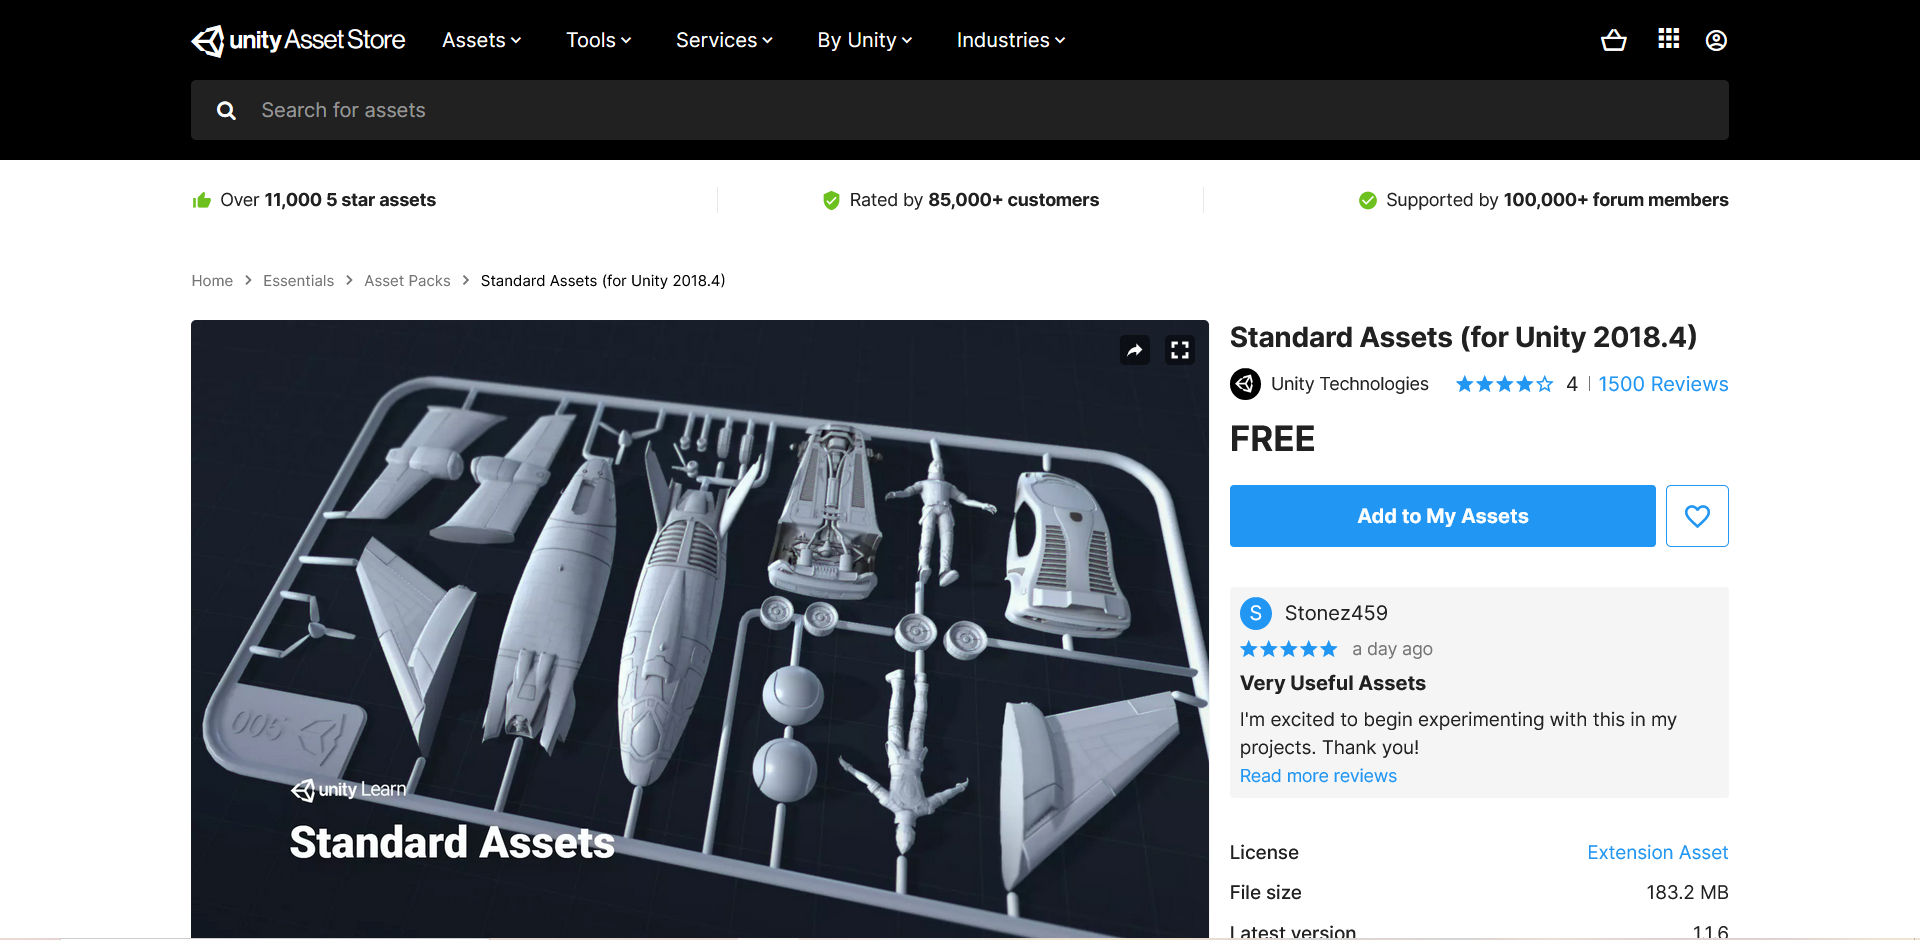
17. Now that we have a simple terrain, let’s start painting some grass, sand, etc. In order to do this, you need to have sample images in your game folder. Unity has a lot of free packages in the Asset Store that can be useful. Open the Asset Store by selecting Window > Asset Store. However, for this lesson, we will be using a package known as Standard Assets, which is not in Unity Asset store [Removed from Unity Assest Store!]. This is a useful package that contains a bunch of different textures that you can use to paint your terrain.
You can download a copy of Standard Assests from https://github.com/anuflo/Unity-Standard-Assets
Next, go back to Unity. Go to Window > Package Manager, and look for the Standard Assets that you just downloaded. Click on it on the left bar, then click on the Import button on the bottom right of the Package Manager tab.
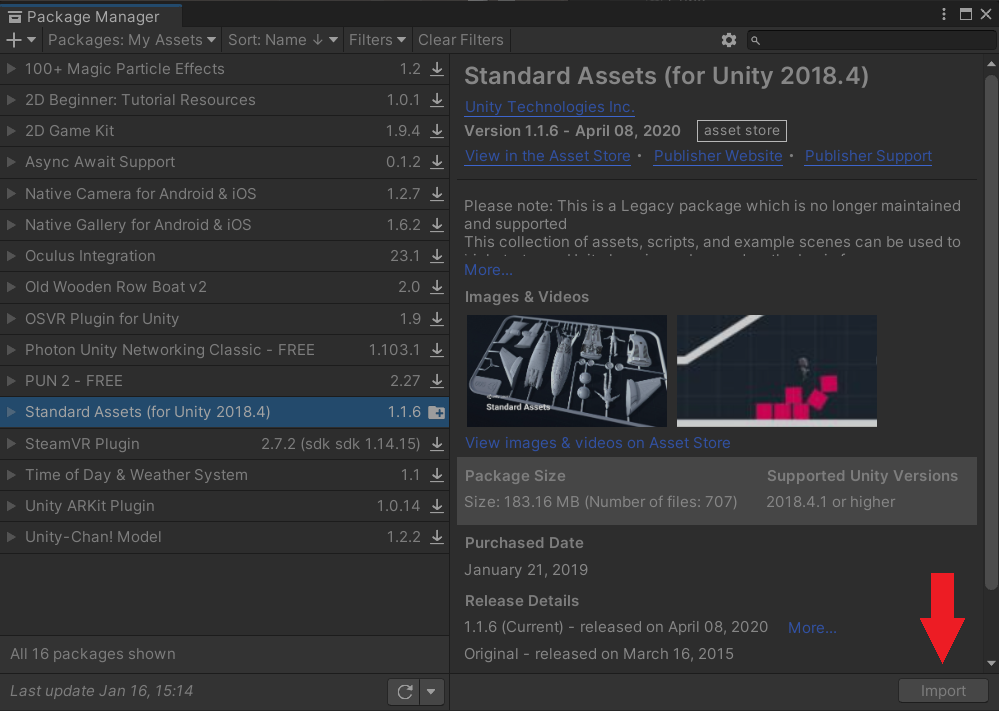
You should see the window below.

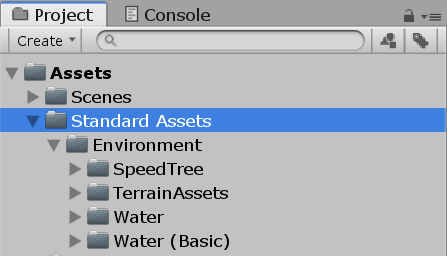
Here you can either choose to import everything or select the assets that you want. For this lab, we only need Environment. Click on the None button, search for the Environment folder, check it, and then Import. You will now notice that you now have a folder added to the project panel called Standard Assets. You can expand the folder by clicking the arrow next to it to view its contents.
Package Incompatable Problem:
On the Standard Assets, there is no updated Standard Assets package updated for 2019.3. Some things will still work, but it was last updated for a version of Unity a couple years old.
Some errors you might come across and solution:
Error 1: GUIText has been removed
Fix:
In SimpleActivatorMenu.cs, add the import statement,
using UnityEngine.UI
then in camSwitchButton method change,
GUIText
to
Text . This will fix the issue.

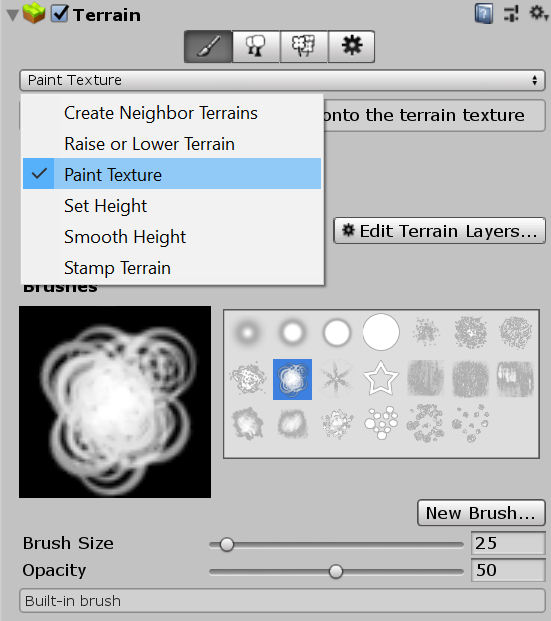
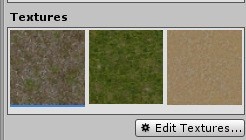
18. Now let’s get painting. Select the terrain in the Hierarchy. You should see the painting options displayed in the Inspector. Select the paint brush 1. Once selected, you should see a Texture section below with an Edit Terrain Layers button 2. Click the button and select Create Layer. A new window will appear called Select Texture2D. You will have to choose an image to be the texture you are going to paint.
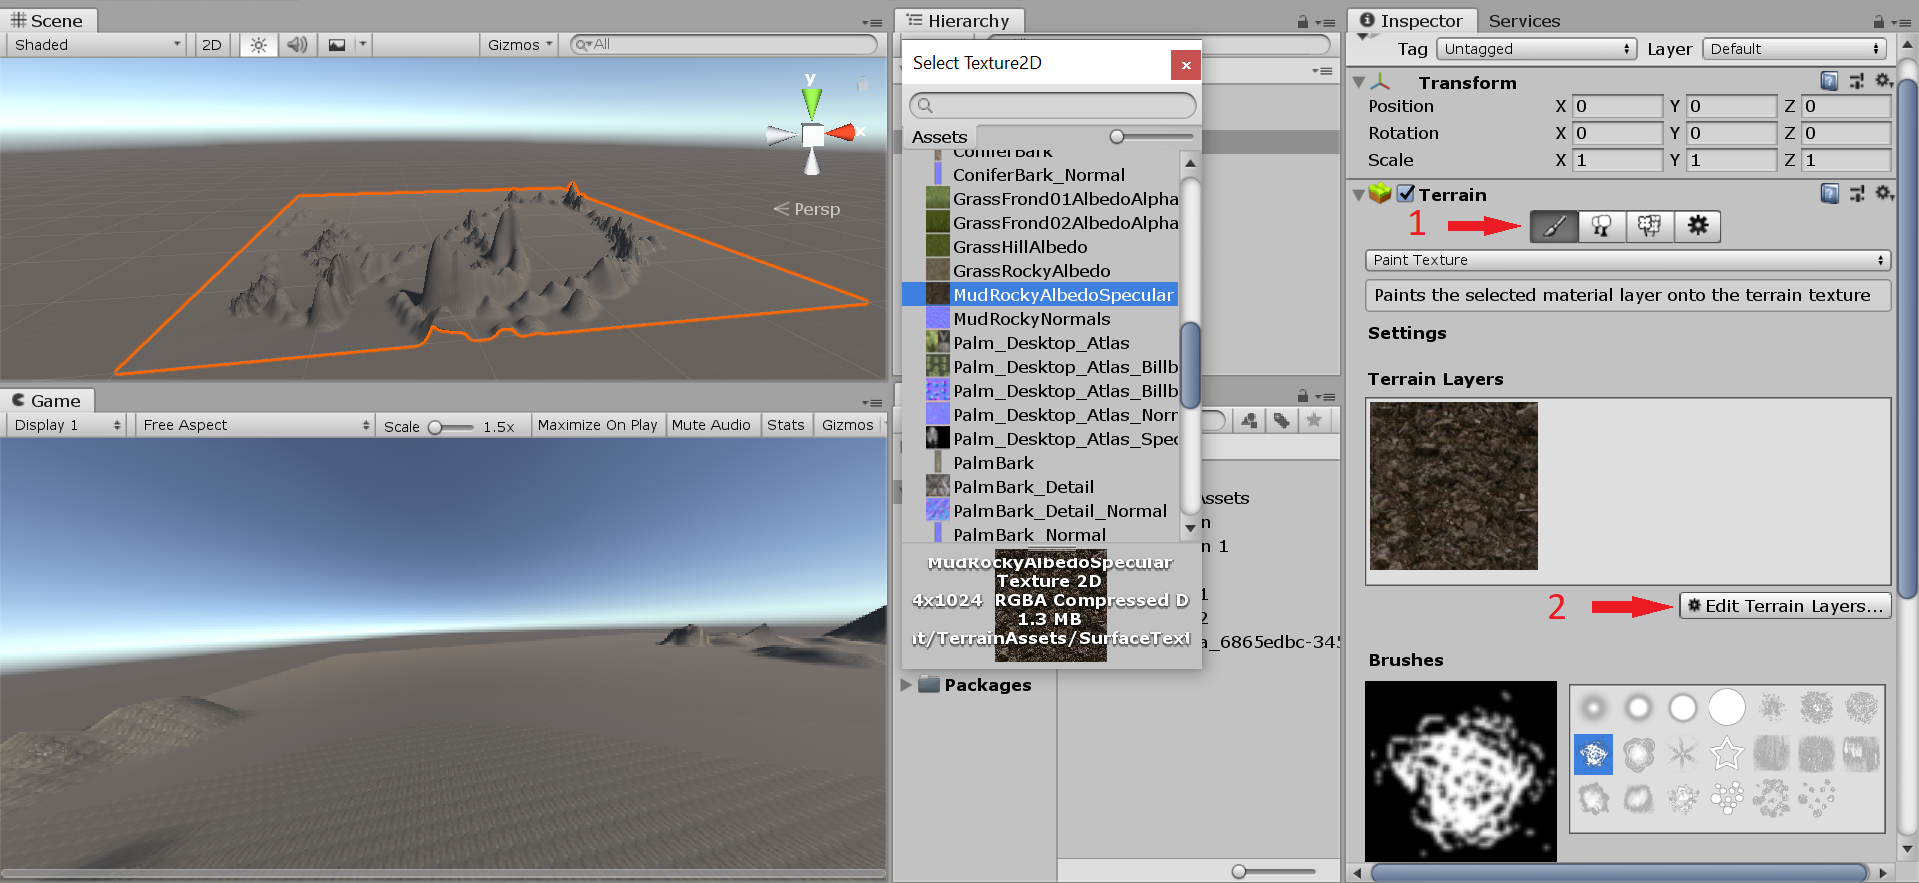
Hover over an image to zoom in
Double-click on the texture you want to select it. You should see this texture being applied to the whole terrain.
19. Now, in order to paint more textures to the terrain, you would have to add the new textures. To do this, just follow step 18 again for each new texture. You will notice that your new texture will be added to the texture list.
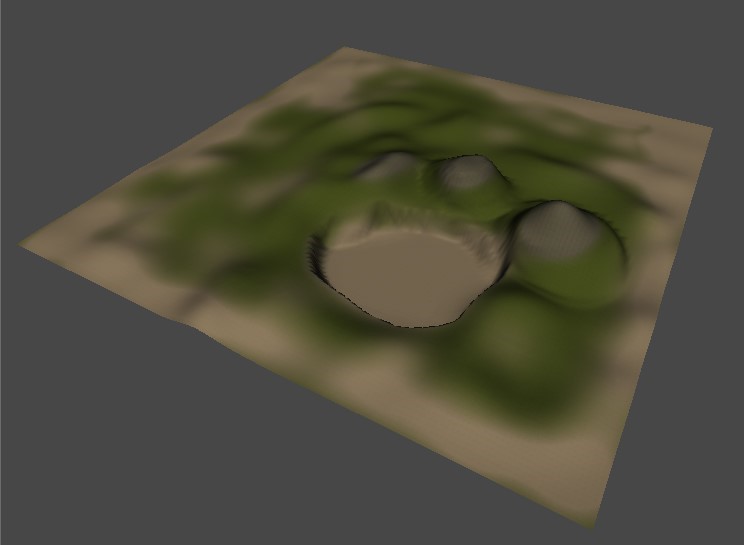
Now all you have to do is select the new texture and paint in your terrain. Again, go ahead and play around with this and ask me if you have any questions. You should end up with a nicely painted/textured terrain similar to the image below.
Improve Your Scene
20. Now that we have our Terrain textured, let’s add some trees. Select the tree icon 1. You will see a new section called Trees with an Edit Trees button 2. Click the button and select Add Tree. A new window called Add Tree will appear. Select the circle next to the Tree Prefab parameter 3. A new window will appear called Select Game Object. Select a tree from the list by double-clicking it. Click the Add button.
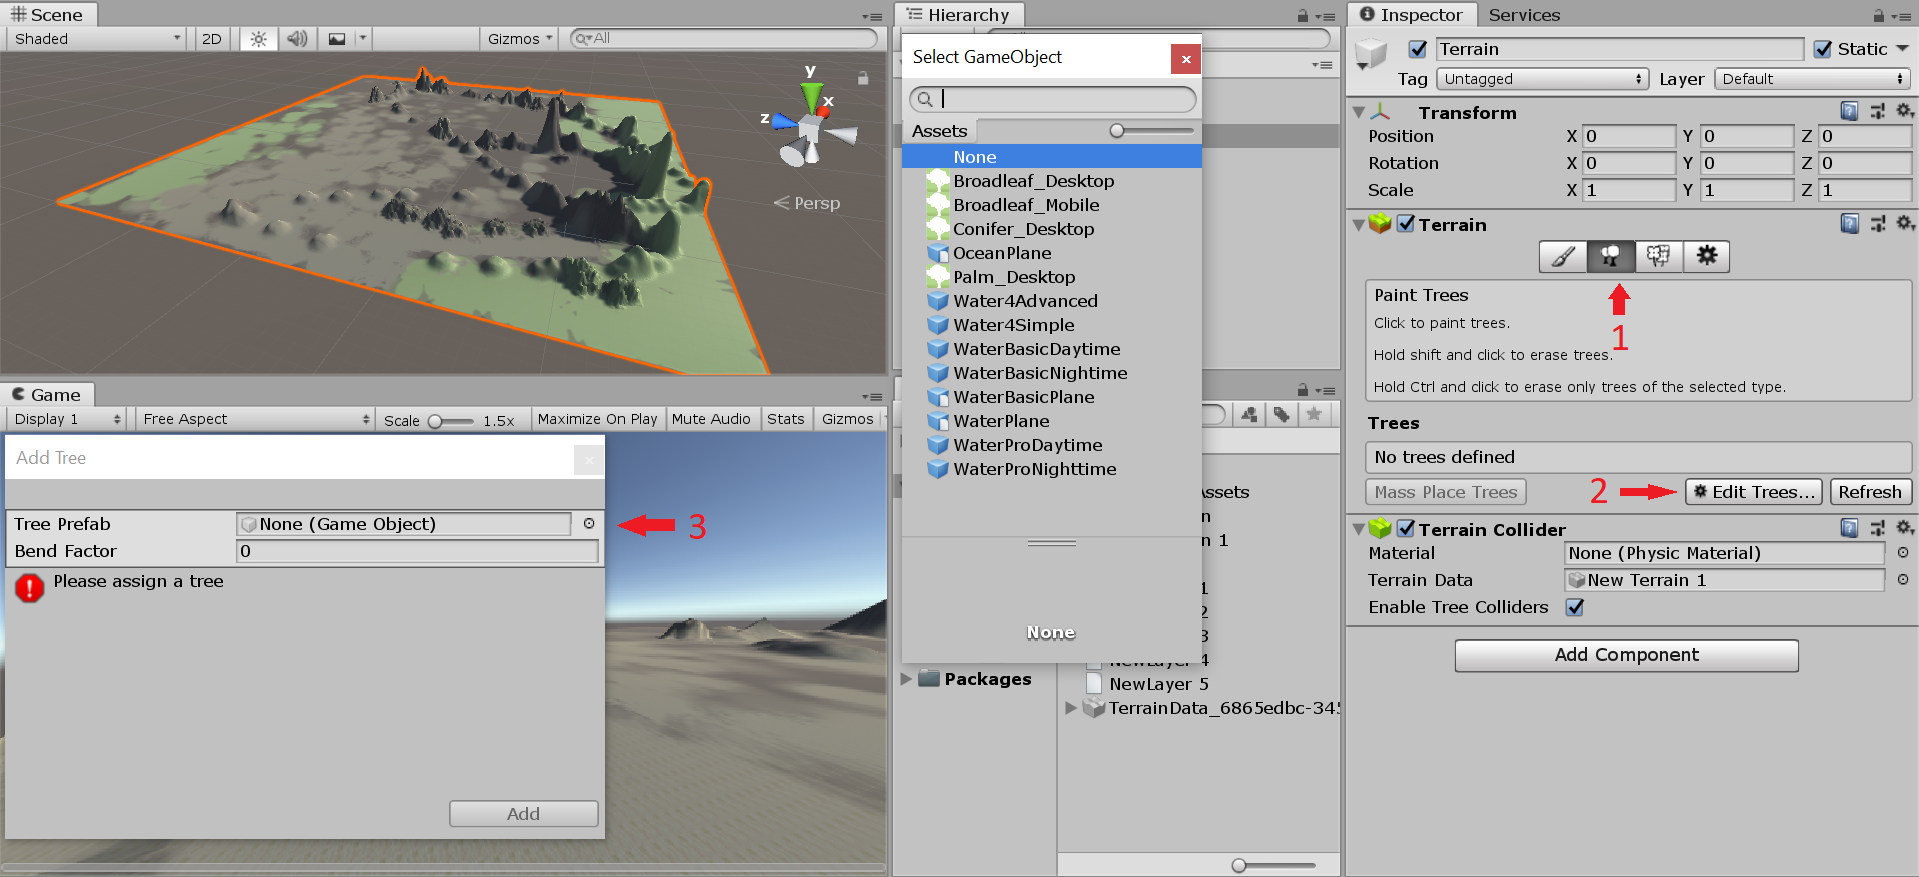
Hover over an image to zoom in
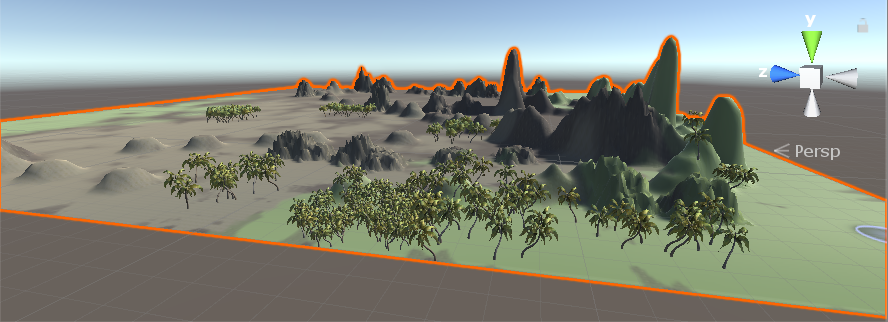
You will now see the tree texture appearing in the list. All you have to do next is to select it and paint the trees onto the terrain. You can play around with the options like Tree height and density to get different effects. Go ahead and go crazy painting the trees onto the terrain. You should get something similar to the image below.
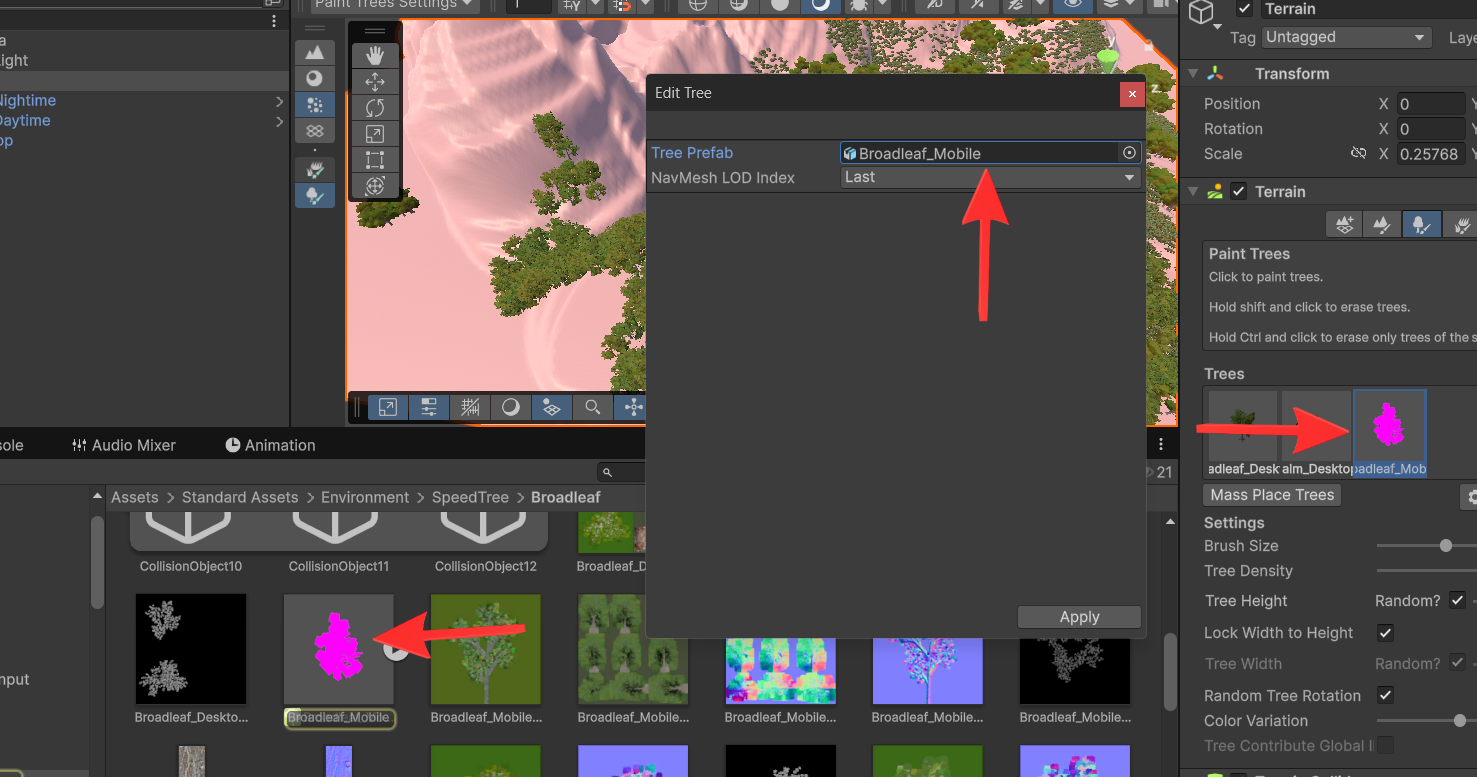
If some of your trees appear pink in Unity 6, follow the steps below to fix this.
1. Select the tree in the scene and double-click it to open the Edit Tree window. In this window, double-click on the tree name to locate the tree asset in the Project window.
2. Click on the highlighted tree in the Project window, then navigate to the Inspector window.
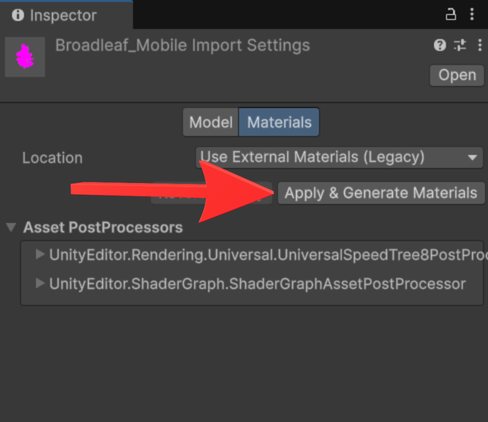
3. In the Inspector, under the Materials tab, set the Location to Use External Materials (Legacy). Then click the Apply and Generate Materials button.
4. Save the project. The pink tree issue should now be resolved.
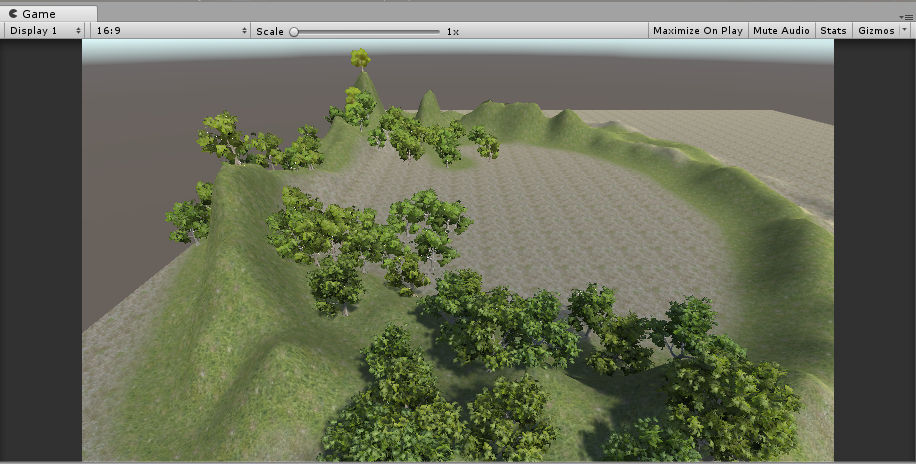
21. Congrats! You have completed the basic Terrain design. Now let’s view how this will actually look like in the game. Press the play Button to run the game.

You will notice that your view in the game will be wrong, something similar to the image below.
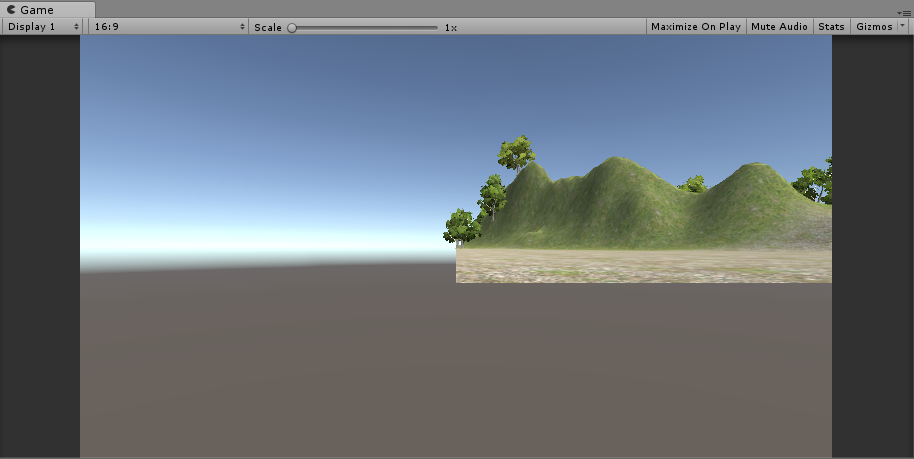
The reason for this is that we have not placed the main camera in a nice location. Press the Play button again to go back to the scene. Select the main camera from the hierarchy. The main camera may not be in view at this moment. A fast way to get the camera in view is to press F or double click on Main Camera in the hierarchy window. Now go ahead and reposition the main camera (using move W, rotate E and scale R)) to get a nice view. You can use the camera preview box to help you with this. Another way to see the changes is to keep switching between Camera and Scene windows. Since the terrain is big, you might want to play around with the far plane value. If you increase the value, more of the terrain will be visible; if you decrease the value, more of the terrain will be clipped. For my terrain, I set this value to 5000. Once you are happy with the view, press Play, and you should get a nicer view similar to the image below.
Set the Environment
22. As you can see, the view is very dark. The reason for this is that there is no lighting set up in the scene. Let’s add some lights now. To do so, go to the toolbar and click GameObject > Light. and you should see a list of different types of lights to use.
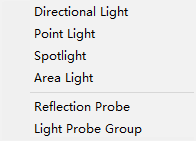
Again, the best way to know the difference between these lights is to try them out. For this lab, we are going to add a directional light. Position the directional light above the terrain. You can rotate the light to give different effects. The yellow lines show you the direction the light is coming from. This will also cast shadows depending on the direction the light is coming from. Once done, your scene should look similar to the image below.

Press the play button and your view will be much brighter now.

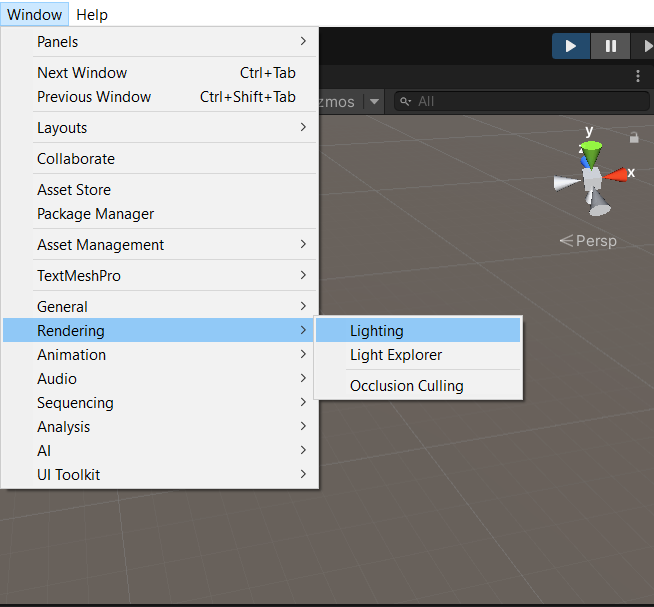
23. Well done! Now we have our scene set up. Let’s beautify it further by setting sky for the scene. In Unity, we can do this very easily by setting a Skybox. Click Window > Rendering > Lighting.
Now let’s set the Skybox. Click to the Environment tab. The view in the Inspector panel will look like the image below.
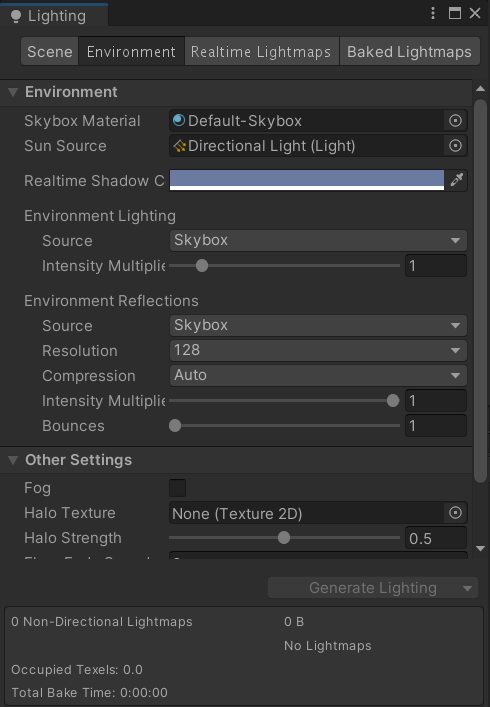
Click on the circle next to the Skybox Material parameter. The window below will appear.
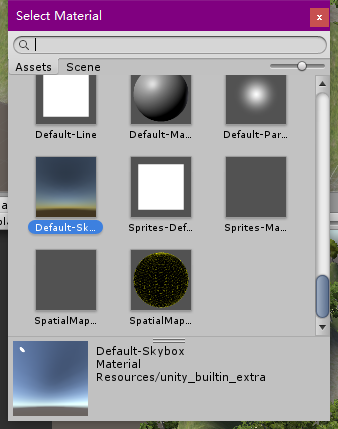
Double-click on the skybox you like. Now click the play button to see how your scene looks like in the game.
24. You may notice that the full terrain can be seen in the game, even objects that are far away. This is fine but not very realistic. Naturally, when we look out at a horizon, things that are very far away tend to blend in with the horizon. We can simulate a similar effect by adding fog. Let’s add some fog. Click Window > Lighting > Environment -> Other Settings. Check the fog check box in the Scene panel.
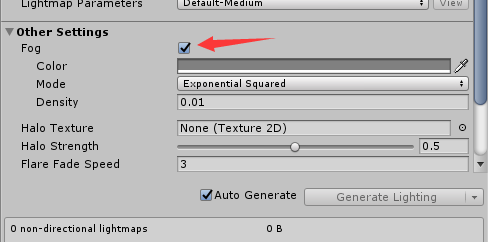
You should see something like this.
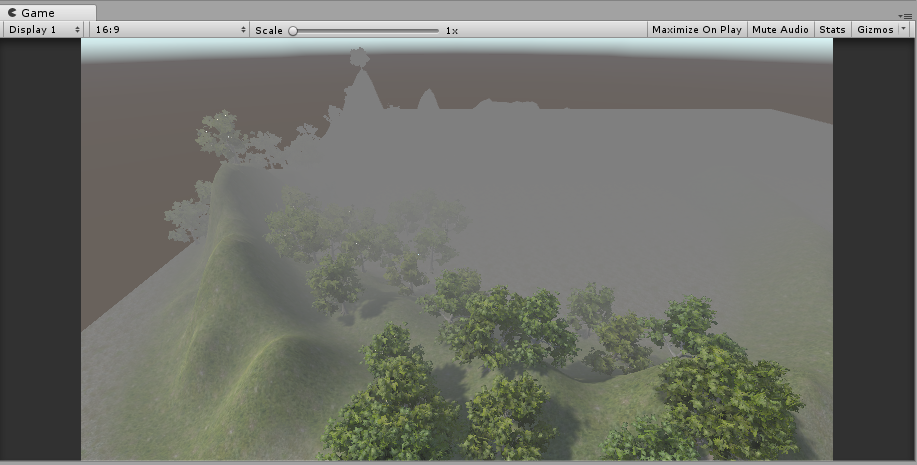
You will notice that the whole terrain turns grey. This grey color is the fog. Currently, there is too much fog, so we need to tweak the values a little. First, let’s adjust the color of the fog to fit the horizon better. Click on the Fog Color parameter.

A new window called Color will appear. Here you can either manually select the color of the fog using the sliders 1 or you could use the color picker 2.
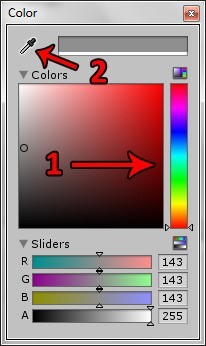
Personally, I prefer the color picker. Click on the color picker. Now you can select the color of the fog based on any color you have in your window. Since we want it to match the horizon, click anywhere on the sky to get a suitable color. You should have something like the image below.
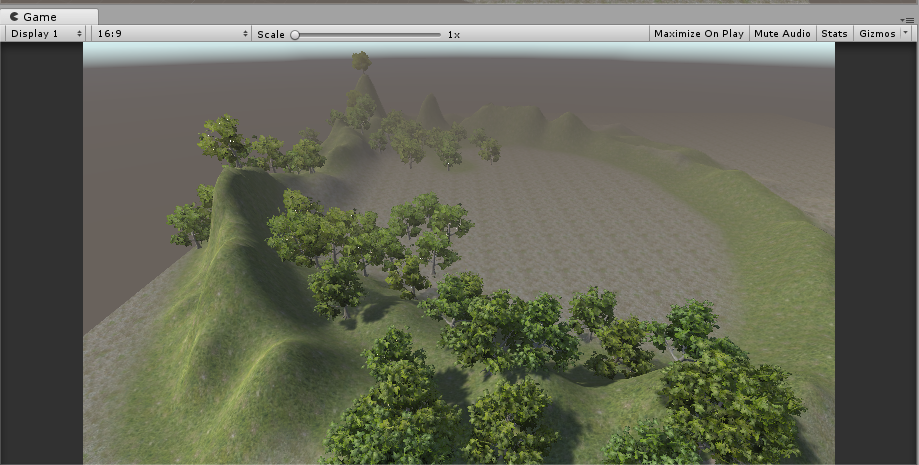
As you can see, the terrain is almost invisible. Now we need to lower the fog value. To do this, just change the Fog density value to a lower number. For my scene, I find the value 0.004 works best. Yours may differ. You would need to play around with different values to find a suitable one. Once done, you would have something like this in your scene.
Now press play to see the effect in the game. It should look something like this.
Add Water
25. Now your scene looks more realistic. We are almost done with the scene, and the lab. All we need to do is add one last element – water. You should find the water folder in your standard assets folder in the project panel. Expand the water folder.
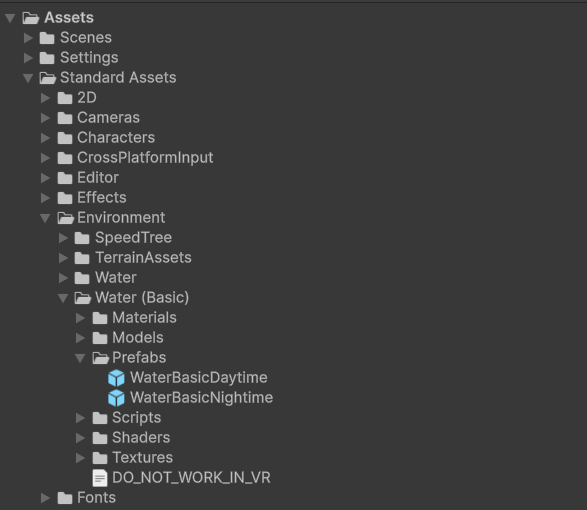
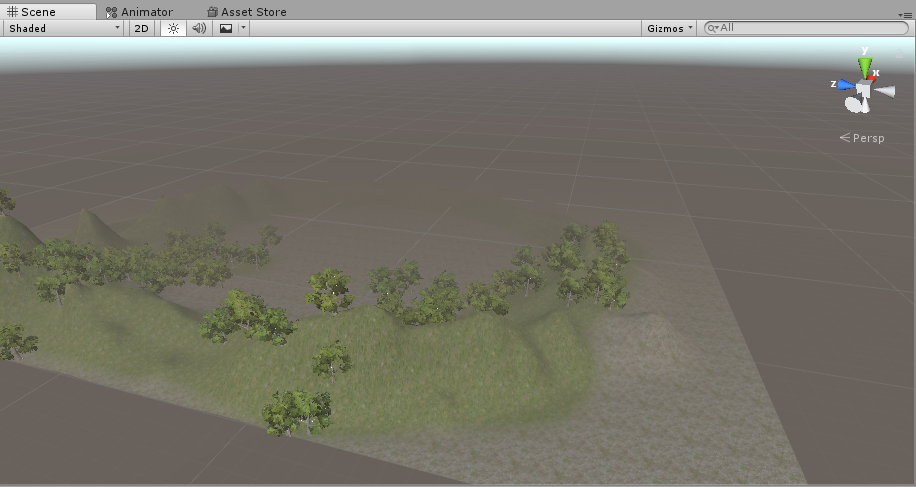
There are 2 different types of water – Daylight and Nighttime water. Select the water appropriate for your scene. Since my scene is a day scene, I’m going to select daylight water. Select the Daylight (or Nighttime) water in the Project panel and drag it into the scene. You can place your water anywhere in the scene. I’m going to place mine in the lake that I have in my terrain. You should have something similar to the image below.
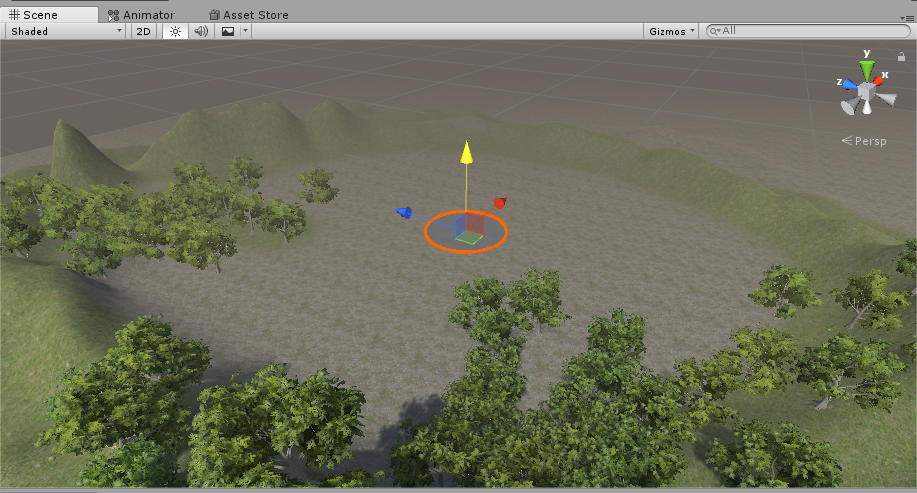
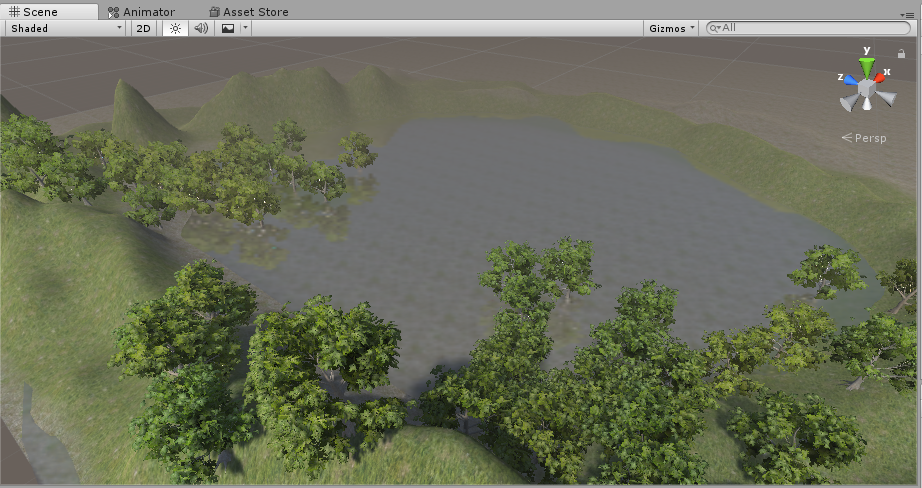
As you can see, the water is very small. You need to resize your water accordingly to get the size that is appropriate for your terrain. After resizing it, you should get something like this.
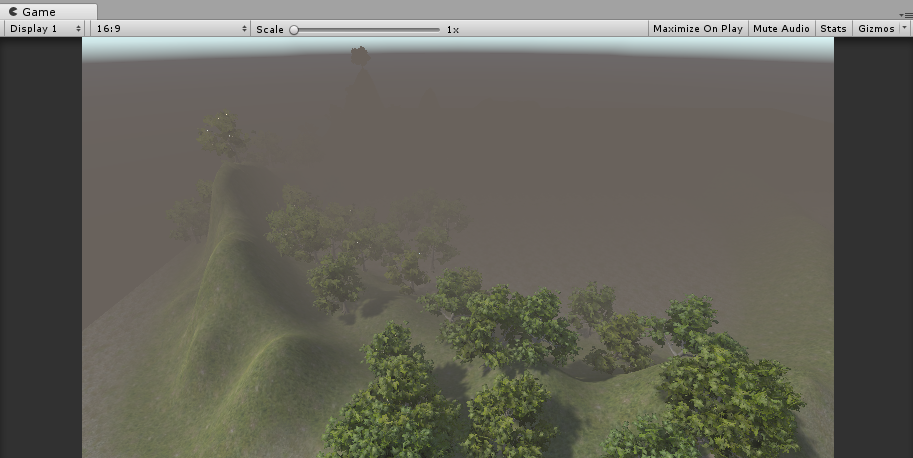
Now press play to see how the water looks like in the game. You may not be able to see the effect of the water if your camera is too far. Reposition your camera nearer to the water to see it. You should see something like the image below, only animated. ☺
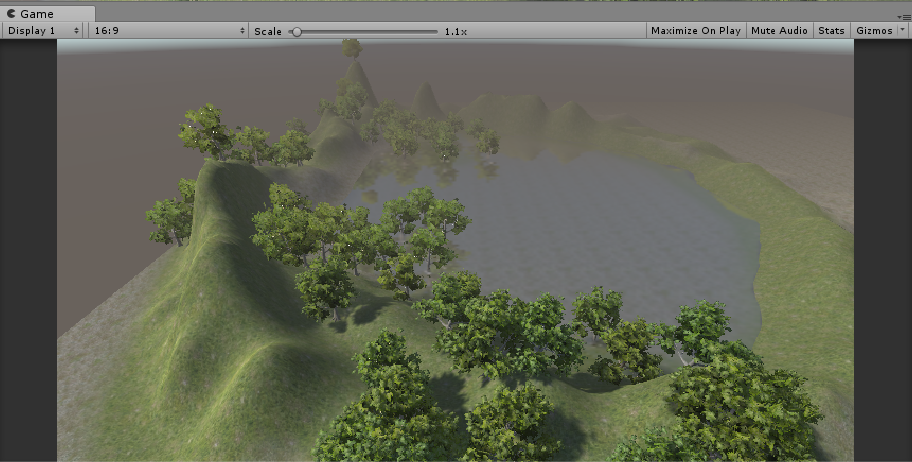
Again, you can play around with the water settings (wave scale, refraction color, etc.) in the Inspector panel to see the different effects it produces.
That’s all! You have now completed your first lab on Unity. For the next Unity lab, you will be learning how to add Particles and learn basic scripting in Unity. ☺
Note: Possible addon: useful packages for terrian -> “Terrain Tool”.