Lesson 8 - AI
AI
In this lesson, we will use C++ in Unreal Engine 5 to write some basic classes which will be used for making Blueprints for AI. As you may have learnt in lectures, game engines like Unreal Engine 5 have AI that are driven by behaviour trees.
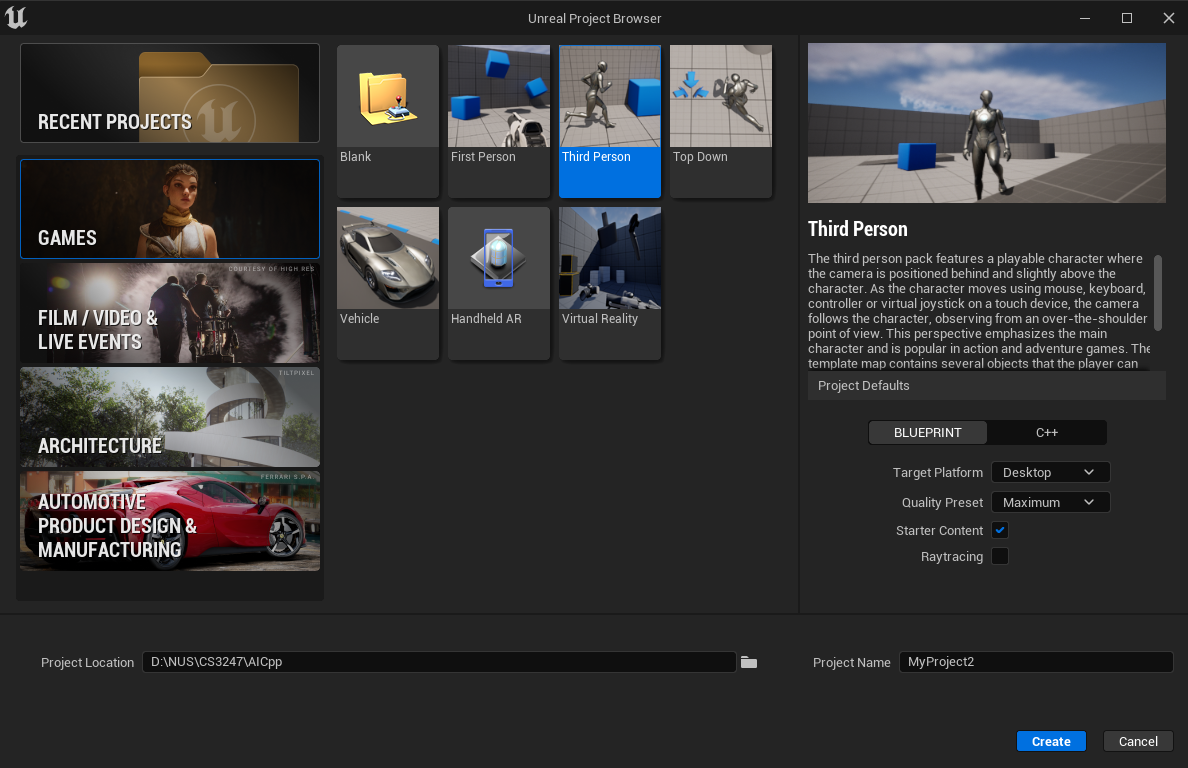
Making A New Project
For this lesson, we will not be using the Master Starter Project. Instead, we will start with the basic third-person project template provided by Unreal Engine 5.
Launch Unreal Engine 5, choose Games > Third Person, and set your Project Location and Project Name. Then, click on Create Project to create it.
When you open your new project, you will see a level called ThirdPersonMap. In this level, you can playtest with the third-person character and walk around with it.

Setting Up
We need to make some preparations for the AI path finding in this level with a NavMeshBoundsVolume. It is an object which you can put in a level which renders with static meshes, generating a walkable area inside its volume area for the AI character. To add it into the level, we can search for it in the Place Actors panel and add it in.
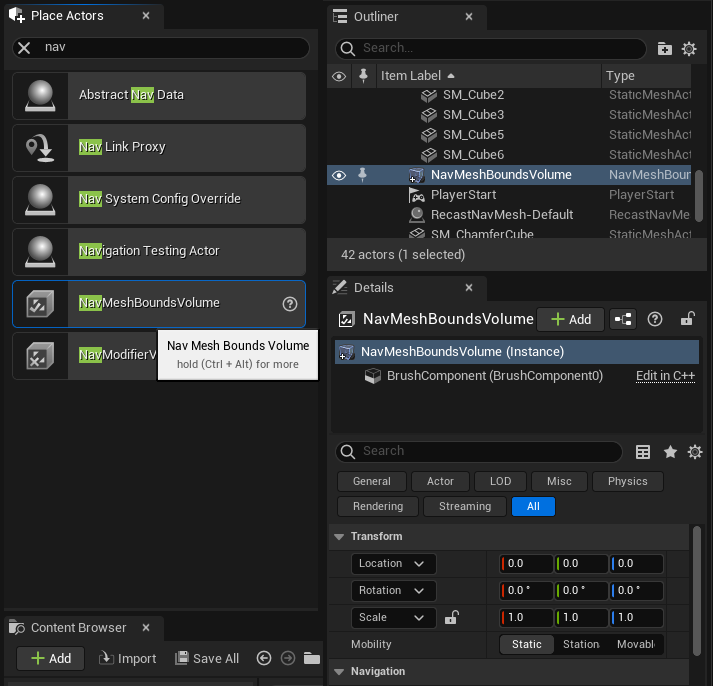
You will need to set an appropriate scale size for the Nav Mesh Bounds Volume to cover the whole area in the level. Press “P” to check the walkable path area rendered by the object, and it will be shown in green in the level.

Next, we need to create a Behavior Tree and a Blackboard which will be used to set the AI actions. A Blackboard is usually used for data sharing between different modules that look like global variables. A Behavior Tree is a tree which can decide how the AI acts. To create them in the project folder, right click and select Artificial Intelligence > Behaviour Tree (and Blackboard). Name them as AI_BT and AI_BB respectively.

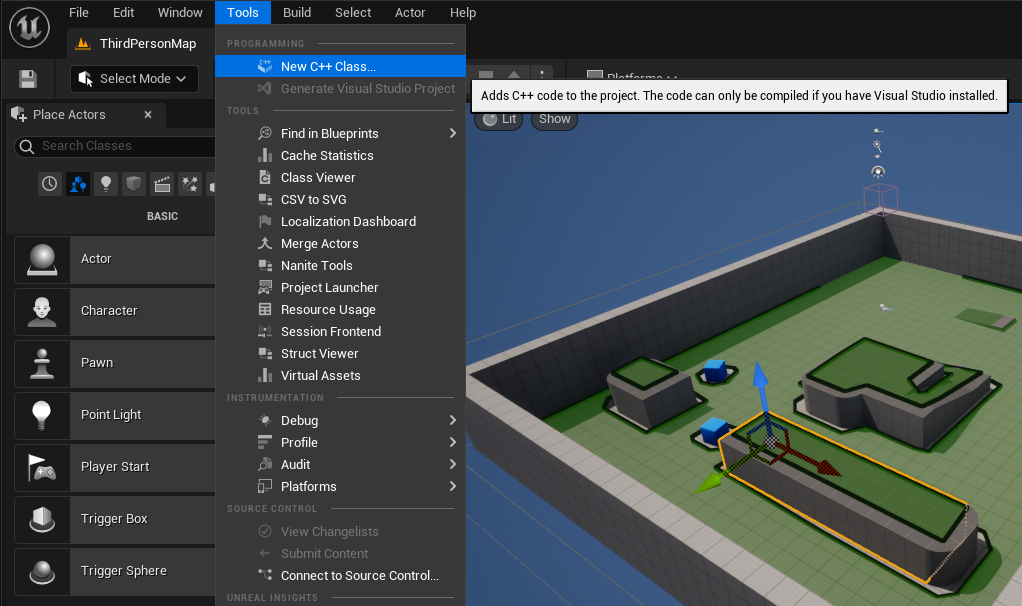
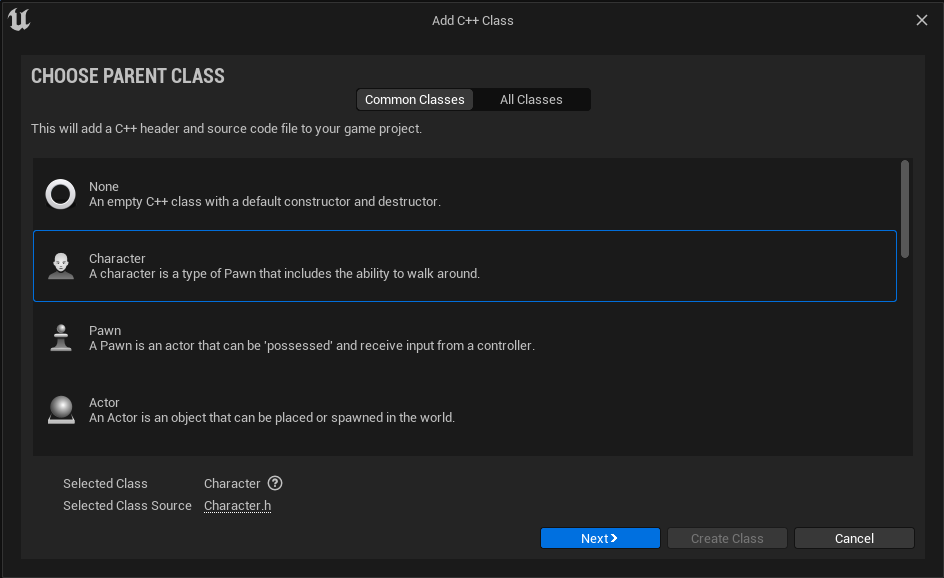
Select Tools > New C++ Class twice. We need to create two Classes for the AI character: AICharacter of which the parent class is Character, and a MyAIController class of which the parent class is AIController. Make sure you have both the latest version of Microsoft Visual Studio and .NET Framework SDK installed before you do this, or the code will be unable to compile.
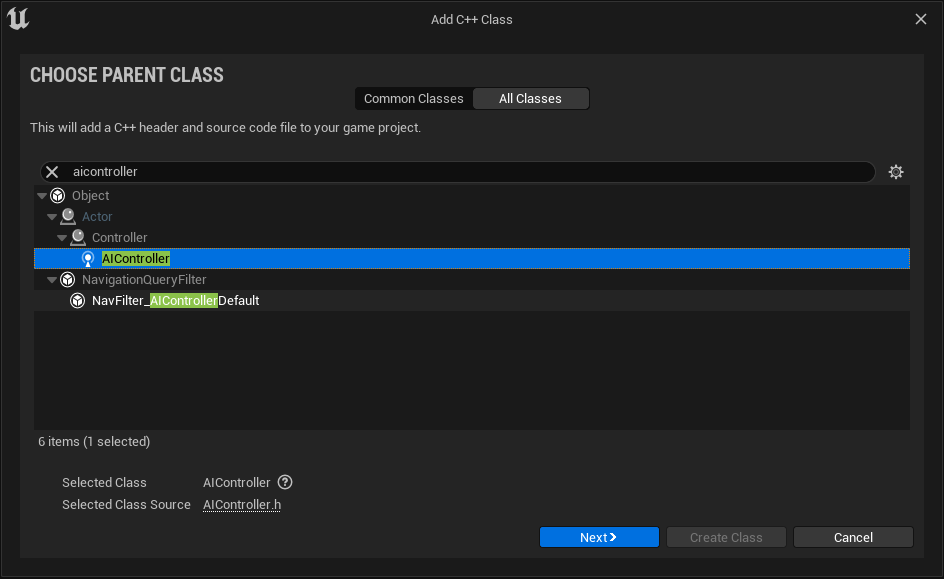
The C++ Classes you added should automatically open in a new Visual Studio window. This is where we will modify the C++ code. It is also a good idea to install the Visual Studio Integration Tool from the Unreal Marketplace.
Lots of great (free) assets can be found on the Unreal Marketplace! Be sure to check it out for assets to add to your projects!
Coding The Classes
We will start with setting up the MyAIController Class first. This class will be used later for generating Blueprints which can be used to control the actions of AICharacter.
Note: Here you see the class declaration using MYPROJECT_API. You will need to change it accordingly to follow <PROJECTNAME>_API.
Let's set the header file as such:
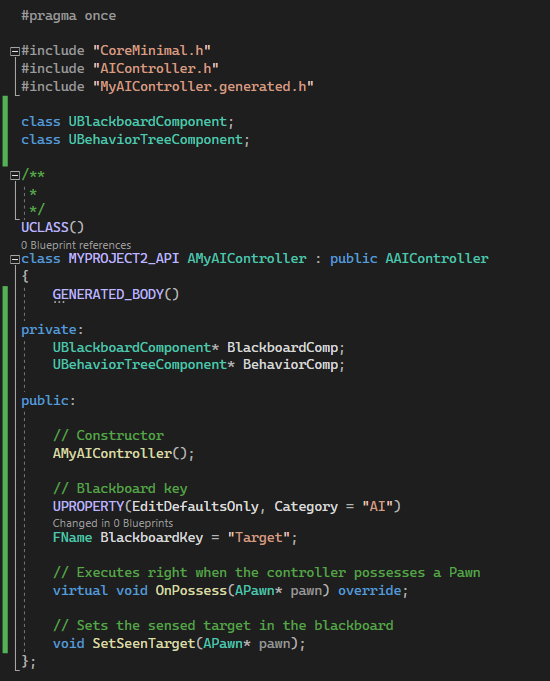
In this header file, we declared the Blackboard and Behavior Tree as private components. We have also set the property of the Blackboard key as “Target”. The target here is our player, as we would like the AI to follow our player. The function SetSeenTarget will be used to set the target that is seen by the AI Character.
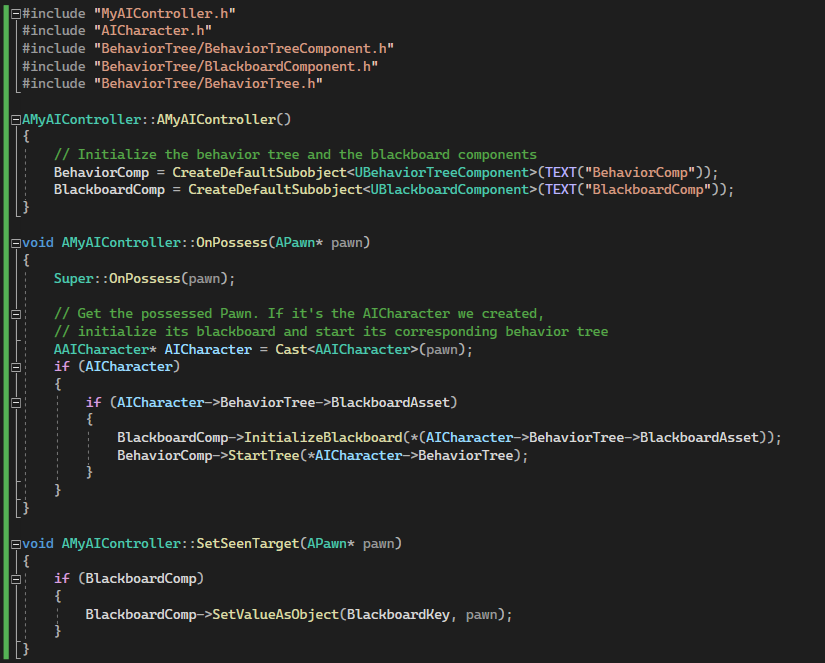
Now, let's set the .cpp file as such:
Now, we can continue with the AICharacter Class. This class will also be used later for generating Blueprints. Set its header file as such:

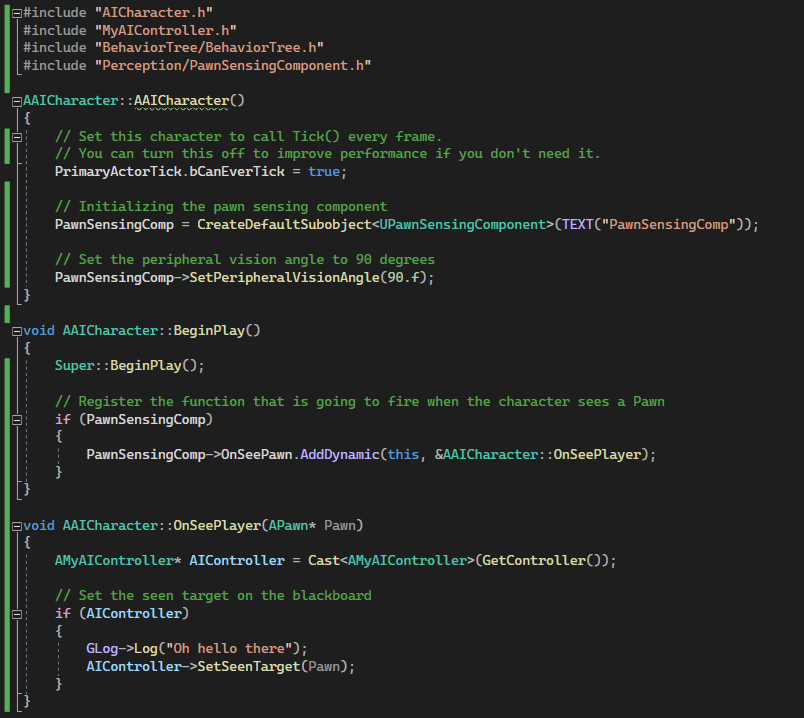
In this header file, we have declared two properties for the AI Character. VisibleAnywhere is used for the AI seeing our player, while EditAnywhere used to set the Behavior Tree for the AI Character. We have also defined the function OnSeePlayer to set the AI's action when it sees our player.
Now, let's set the .cpp file as such:
Building Up The Blueprint
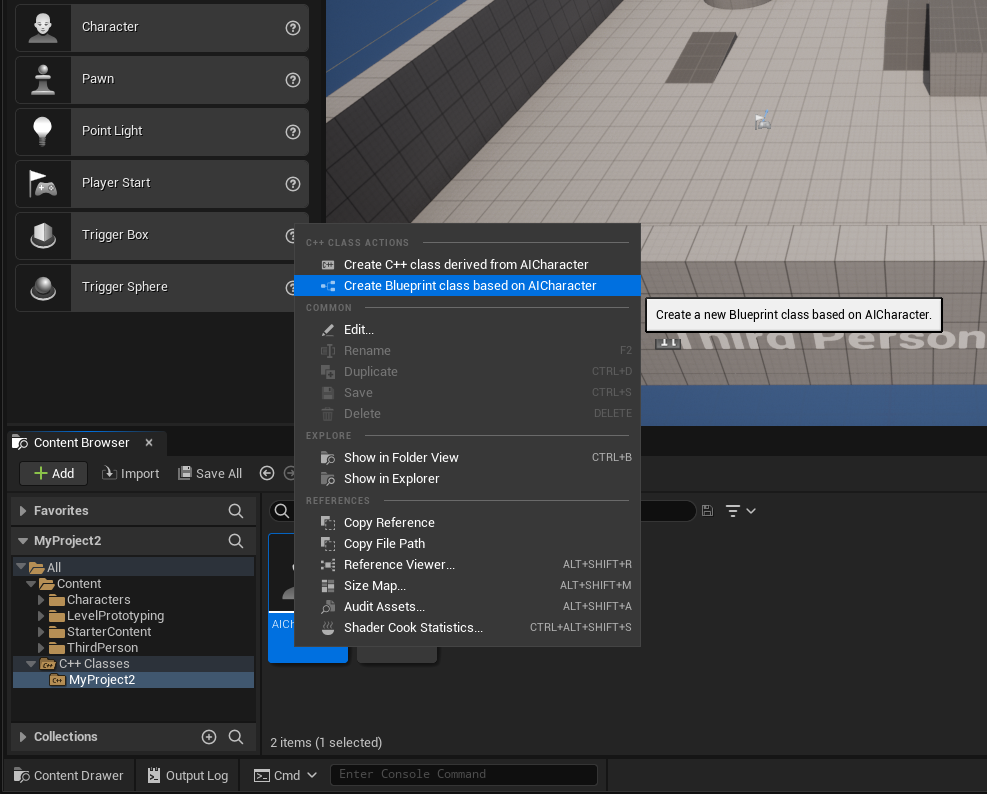
Now that we are done coding out both Classes, we can generate our Blueprints from them. Right click on these C++ classes and choose Create Blueprint class based on AICharacter (and MyAIController). Name these Blueprints as BP_AICharacter and BP_MyAIController respectively.
Next, we need to set up some properties for BP_AICharacter. Open up the Blueprint Editor.

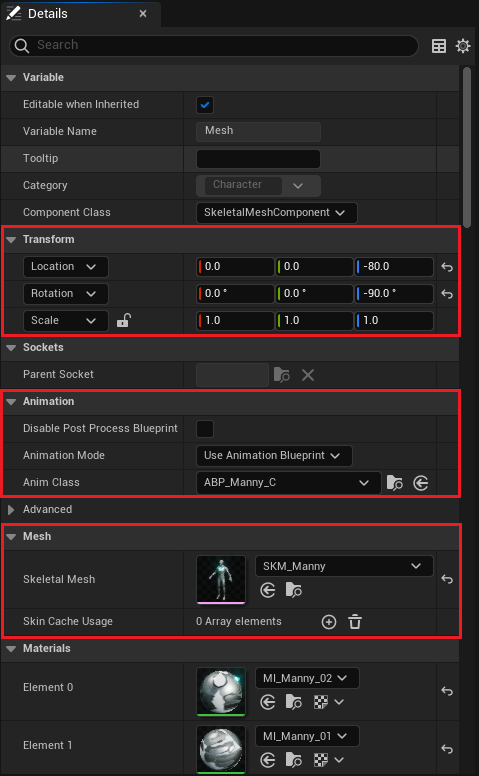
Set the following properties for the Mesh component under Transform, Animation, and Mesh:
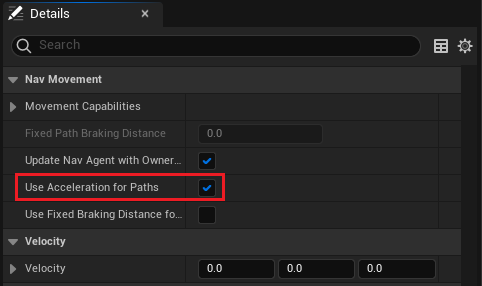
Then, select the Character Movement component and tick Set Acceleration for Paths. This will allow the character's animations to play properly when moving around:
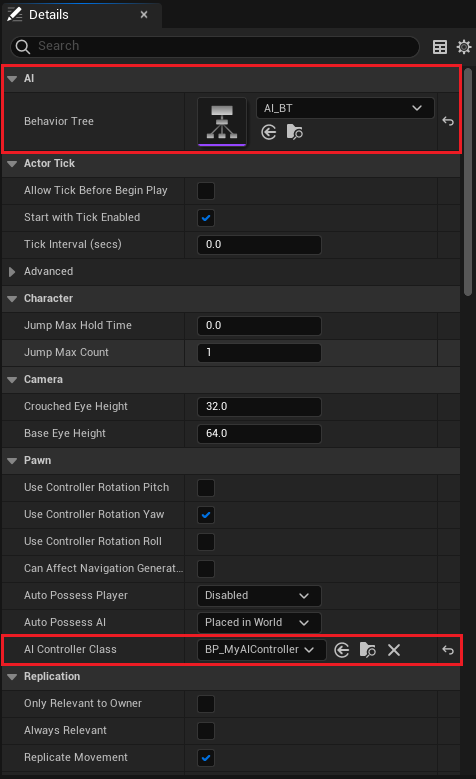
Finally, select BP_AICharacter (self), set it with the following properties and save:
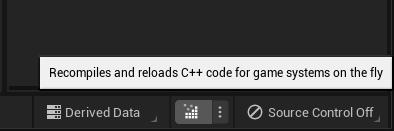
Take note that if you have modified any of the Classes, you will need to recompile them before using the Blueprints. To recompile, click on this button on the bottom right of the window:
Building Up The Behavior Tree
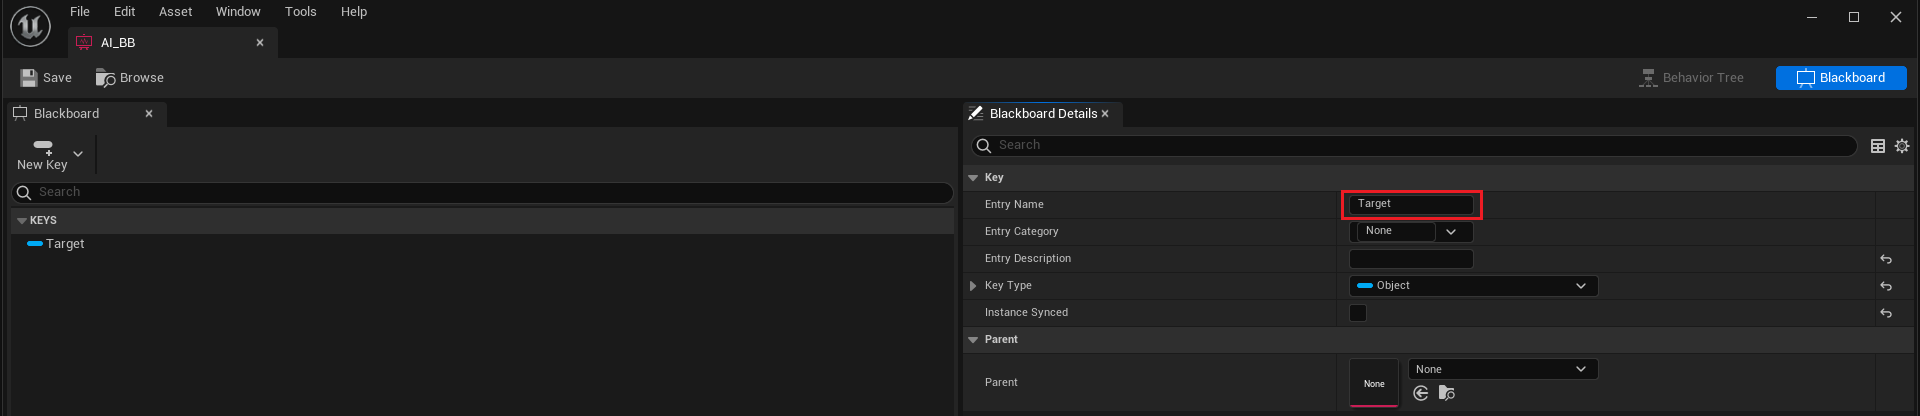
Now that we have built up our Blueprint, we now have to build up the Behavior Tree for the AI. First, go to AI_BB to set up the target. As there is only one target in the logic (which is our player), what we should do is just rename the Entry Name found under Key to “Target”.
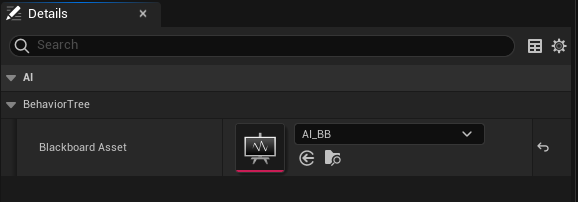
Next, go to AI_BT and set the Blackboard Asset to AI_BB.
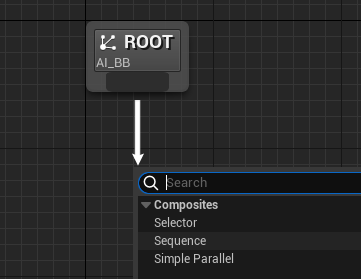
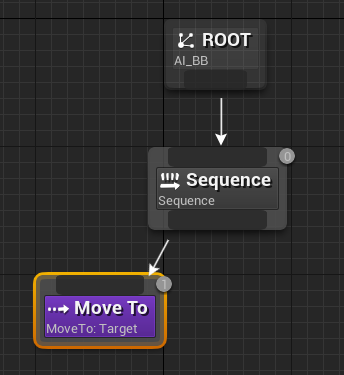
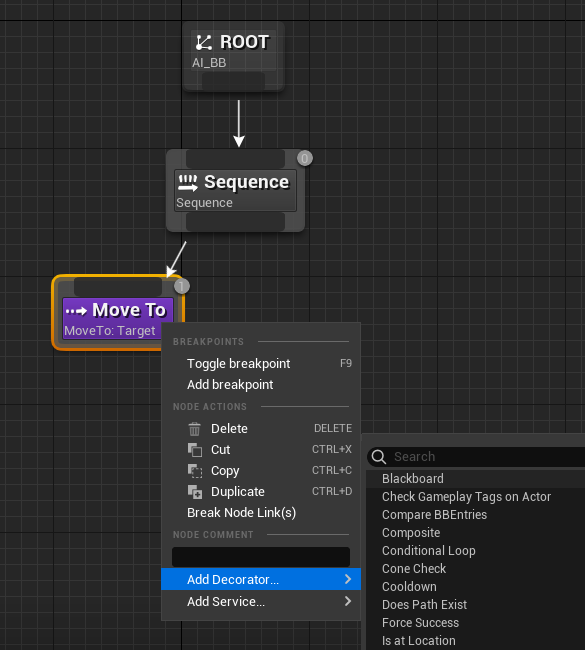
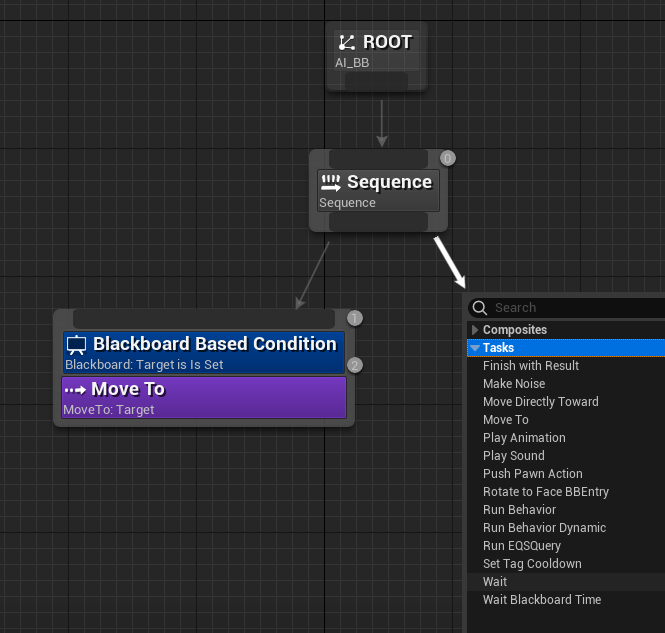
Now, we need to set up the logic below. It means that when the target is seen (set), the AI will move to the target. Otherwise, the AI would wait.
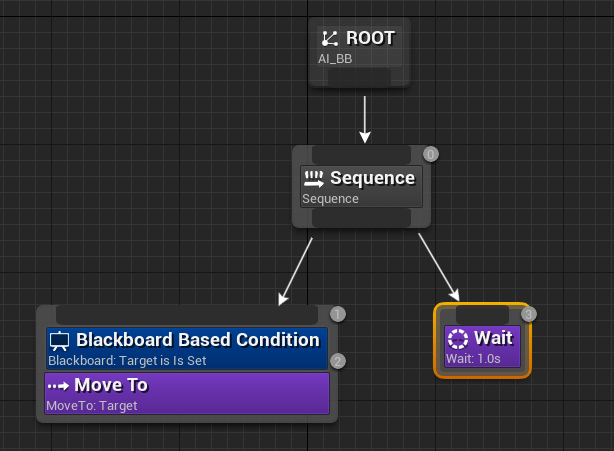
Follow the next few pictorial steps to set up the logic:

When you are done, save it. Your Behavior Tree is now complete!
Conclusion
You now have a functional AI! To test it, pull BP_AICharacter into the level and play it. You will find that after the AI sees your character, it will start following.
We’ve covered a lot of material in this lesson. Here is a recap:
- Setting up a Nav Mesh Bounds Volume.
- Creating and coding out C++ Classes for the AICharacter and MyAIController.
- Building up our Blueprint and Behavior Tree.